
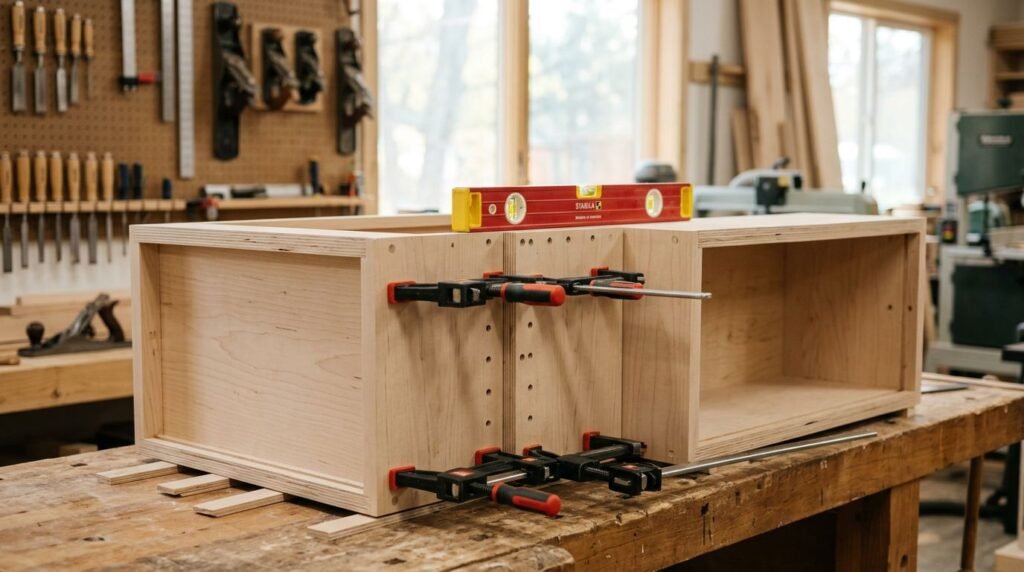
A cabinet run can look beautiful on paper and still fail at installation if adjoining boxes twist, step forward, or pinch a drawer. The goal when you join cabinet boxes is simple: create one level, plumb, flush line that supports countertops, doors, and drawers without strain.
That takes more than driving a few screws through the cabinet sides. Careful clamping, accurate shimming, and the right fasteners protect both the cabinet finish and the fit of every moving part.
Start With a Level Reference Line
Cabinets should follow a level line, not an uneven floor or a wavy wall. Find the highest point of the floor along the run with a laser level or long spirit level. This point becomes the reference for base cabinet height.
For wall cabinets, mark a level installation line at the planned bottom edge. Locate and mark wall studs before lifting any boxes into place. A solid fastening point matters because adjacent cabinets should not carry the whole load.
Good preparation also protects your investment. Remove doors and drawers if the manufacturer allows it, label each piece, and store them on padded material. This makes the boxes lighter and prevents a handle, hinge, or finished corner from getting scratched.
Before installation day, review the room, appliance openings, and final clearances with a cabinet installation preparation guide. A straight run begins with walls, floors, and dimensions that match the plan.
Check Each Box Before Joining It
Set the first cabinet in position and verify three things:
- The cabinet is level from side to side and front to back.
- Its front edge is plumb, meaning it stands straight vertically.
- The face frame or front cabinet edge aligns with the marked layout line.
Shim under base cabinets to correct low floor areas. On slab homes, base cabinets also need concrete-rated floor anchoring rather than wood screws, and our guide to anchoring base cabinets to concrete covers the details. Place shims near the cabinet corners and support rails, rather than in the middle where they can allow the box to flex. Use composite shims in areas exposed to moisture, such as sink bases or bathroom vanities.
A cabinet can be level on top while its front edge is out of plumb. That small twist can create uneven door gaps across the entire run.
How to Join Cabinet Boxes Without Pulling Them Out of Alignment
Install and secure the first cabinet to the wall before adding the next one. Then set the neighboring box beside it, but don’t fasten the two together yet.
Adjust the second cabinet with shims until its top, front, and bottom align with the first. Run a straightedge across the cabinet fronts. If one box sits even slightly ahead, the finished run will show a visible shadow line.
When you join cabinet boxes, keep checking the full run instead of focusing only on the seam in front of you. A small error repeated across several cabinets can leave the last box far off the layout mark.
Clamp Finished Surfaces Carefully
Use two cabinet clamps or padded bar clamps to pull the adjoining fronts flush. Cabinet-face clamps work well because they hold the frames in alignment while keeping hands free for drilling.
For face-frame cabinets, clamp the two face frames together near the top and bottom. Add painter’s tape, felt pads, or thin scrap wood under clamp jaws to avoid denting or marring the finish.
Frameless cabinets need a slightly different approach. Their visible front edges are usually finished panels rather than solid face frames. Clamp the side panels carefully and use flat protective blocks so the clamp pressure spreads across a wider area.
Don’t overtighten the clamps. Excess pressure can bow a cabinet side, distort a face frame, or chip a painted edge.
Fasten Face-Frame and Frameless Cabinets Correctly
The screw location depends on cabinet construction. Never assume every box joins in the same way.
Joining Face-Frame Cabinet Boxes
Face-frame cabinets have a solid wood frame around the opening. Once the frames are clamped flush, drill pilot holes through the frame of one cabinet and into the neighboring frame.
Place screws where doors, drawer fronts, and hinge hardware will hide them when possible. Common locations include the upper and lower frame rails, several inches in from the corners.
Use cabinet connector screws or trim-head screws approved by the manufacturer. The screw must pass through both frames without poking through the interior side or finished exterior. In many cases, a 1 1/4-inch cabinet screw suits two 3/4-inch frames, but always confirm the actual frame thickness first.
Joining Frameless Cabinet Boxes
Frameless cabinets have thicker side panels and no front frame. Clamp the boxes flush at the front, then drill pilot holes through the interior side panel near the front and rear edges.
Use manufacturer-approved connector screws, often a #8 by 1 1/4-inch cabinet screw for two 3/4-inch panels. Check the cabinet specifications before drilling because panel thickness and hardware can vary.
Keep screws away from drawer-slide hardware, hinge plates, shelf-pin holes, and finished exterior panels. If a decorative end panel will remain visible, fasten from inside the cabinet whenever possible.
A polished cabinet design depends on these small details. Clean interior screw placement and even reveals make new cabinetry look built into the room rather than assembled in sections.
Shim the Wall, Not the Cabinet Front
Walls are rarely perfectly flat. If a wall bows inward, don’t pull the cabinet back rail tight until the cabinet front twists. Instead, place shims behind the mounting rail at stud locations.
Drive cabinet installation screws through the back rail, through the shim, and into solid framing. Check the cabinet face again after each screw. A screw can pull a box out of square if the shim isn’t thick enough.
For a long kitchen wall, check alignment after every two or three cabinets. Use a long level across the tops and a straightedge across the fronts. Then recheck door and drawer operation before adding the countertop.
Careful layout matters before a single screw goes in. Kitchen cabinet layout planning helps account for appliances, filler strips, work aisles, and wall conditions that affect a straight cabinet run.
Reinstall Doors and Make Final Adjustments
After every cabinet is joined and anchored, reinstall doors and drawers. Adjust hinges so door gaps look even and doors don’t rub. Test each drawer for smooth travel, especially where two cabinet boxes meet.
Inspect the cabinet tops with a long level before countertop templating. Minor adjustments are far easier now than after stone, quartz, or solid-surface counters are installed.
Wipe away pencil marks, remove protective tape, and inspect every finished edge under good lighting. A clean installation protects the cabinet finish and lets the room’s materials take center stage.
A Straight Cabinet Run Starts With Patience
A strong cabinet connection comes from deliberate setup, not extra force. Level each box, shim where the wall or floor changes, clamp the fronts flush, and drill pilot holes before fastening.
When you join cabinet boxes with those checks in place, doors align better, countertops sit properly, and the entire room has a tailored appearance. The seam between two cabinets should disappear into a run that feels precise and permanent.