 Skip to content

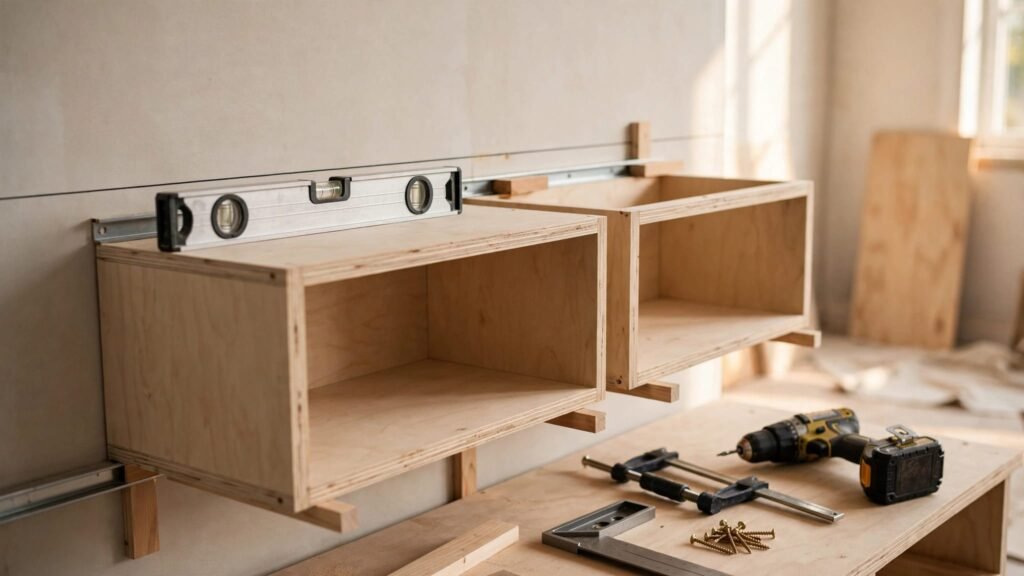
Wall cabinets can look level while the cabinet boxes are slightly twisted. That small distortion can create uneven door gaps, misaligned faces, and drawers that rub across the finished run. To level wall cabinets properly, correct the wall behind them with shims while keeping each box square.
The goal is one straight, plumb, level line that supports the doors, drawers, countertop, and trim. A careful sequence also protects finished surfaces and prevents excessive force on mounting screws. Start with the room, the reference lines, and the cabinet plan before lifting any boxes.
Key Takeaways
- Establish a level line for the complete wall-cabinet run.
- Shim between the wall and the cabinet mounting rail, not behind the cabinet front.
- Check level, plumb, square, and face alignment after every cabinet.
- Fasten into verified studs, properly installed blocking, or an approved masonry system.
- Use pilot holes and suitable fasteners instead of tightening screws until the box bends.
- Join neighboring cabinets only after their tops, fronts, and bottoms align.
- Use trim or scribe molding to close small wall gaps, not to hide a crooked cabinet.
- Recheck door gaps, drawer movement, and cabinet stability before the installation is complete.
Why the Whole Cabinet Run Matters
A cabinet box is built square, but a wall may bow, lean, or change shape along its length. If each cabinet is adjusted independently, the installation can slowly drift out of alignment.
Leveling a run is different from leveling one box
Set a level reference for the entire row, then use that line to position each cabinet. The top edge, bottom edge, and cabinet fronts should relate to the same layout rather than to isolated high or low points in the wall.
A cabinet can read level across its top while its front edge leans slightly forward or backward. That condition is out of plumb, and it can change the door reveal across the cabinet. The problem becomes more visible as additional boxes are joined.
The Fort Myers kitchen cabinets guide recommends leveling and squaring across the complete run rather than treating every cabinet as a separate installation.
Excessive screw pressure causes problems
A screw driven into an uneven wall can pull the back of a cabinet toward the framing while the front remains unsupported. As the screw tightens, the box may rack out of square.
Stop tightening when the cabinet is secure and properly supported. If the wall gap remains, add an appropriate shim behind the mounting rail at the fastening point. The shim transfers pressure to the wall instead of forcing the cabinet shell to bend.
A mounting screw should hold a supported cabinet in position. It should not force a square box to follow a crooked wall.
Prepare Before Lifting the Cabinets
Good preparation reduces the corrections needed during installation. It also helps prevent drilling into plumbing, electrical wiring, ductwork, or protective plates.
Confirm the layout and room conditions
Review cabinet widths, filler locations, appliance openings, window heights, soffits, outlets, and plumbing before installation. Check the wall for high spots, low areas, loose drywall, and sections that lean out of plumb.
The planned cabinet height should also agree with the countertop, backsplash, hood, microwave, and upper trim. A common countertop-to-wall-cabinet clearance is 18 inches, but the approved layout and appliance requirements take priority.
Use the cabinet installation preparation guide to review room access, wall readiness, reference lines, and the installation order before delivery.
If the layout has changed, review it through a cabinet design consultation before installation begins. A small change in cabinet width or appliance position can affect the entire run.
Mark framing and protect the cabinet parts
Locate wall studs and any properly installed blocking before the cabinets go up. Mark their positions on the wall or reference line. Wall cabinets must be fastened into suitable wall framing, blocking, or an approved masonry system. Adjacent cabinets should not carry the full load of a poorly anchored cabinet.
When the manufacturer permits it, remove doors and drawers before lifting. Label each part and place it on padded material. This lowers the cabinet weight and helps prevent scratches to doors, hinges, handles, and finished corners.
Before drilling, confirm that marked fastening points do not conflict with utilities. Turn off power or water when the work area requires it.
Tools and Reference Lines for Accurate Installation
The right tools make it easier to see a small twist before it spreads through the run. Keep these items available:
- A long spirit level or laser level for the installation line
- A straightedge for checking cabinet fronts
- A tape measure and pencil
- A stud finder or verified framing layout
- Composite or other suitable shims
- Clamps designed for cabinet assembly
- A drill, driver, and correctly sized bits
- Pilot-hole bits appropriate for the cabinet and fastener
- A square for checking cabinet corners
- Padded supports for doors and drawers
Mark the planned bottom edge of the wall cabinets with a level line. Check the line at both ends and at several points along a long wall. Do not use a visibly uneven ceiling, countertop, or wall surface as the reference.
Wall-cabinet sizes vary. Common heights include 30, 36, and 42 inches. Depths often range from 12 to 15 inches, with deeper options available for some layouts. The standard kitchen cabinet dimensions should be compared with the approved plan, appliance clearances, and available room space.
How to Level Wall Cabinets Without Twisting the Boxes
Install the first cabinet at the planned reference point. The first box establishes the position for every cabinet that follows, so take time to check it before fastening.
Support the full run with shims
Place the cabinet against the wall and bring its planned edge to the reference line. Check the top with a level in both directions. Then check the front edge for plumb and use a square to confirm that the box has not racked.
If the wall is uneven, place shims behind the mounting rail or reinforced back area at verified fastening locations. Use composite shims in areas exposed to moisture, including sink bases and bathroom vanities. A shim should fill the gap without pushing the cabinet front out of position.
Check the cabinet face after each fastener is installed. If the front moves, loosen the fastener, correct the support, and try again. Do not pull a cabinet tight against a wall bow when doing so twists the box.
Fasten through solid mounting rails or reinforced back areas, never through shelf panels, thin backs, decorative trim, or locations that could interfere with hinges and drawer slides. Drill pilot holes when required by the cabinet manufacturer and use fasteners suited to the cabinet and wall assembly.
Keep the cabinet box square
A cabinet may be level across its top and still have a twisted front edge. Place a straightedge across the fronts of neighboring cabinets to check that they sit in one plane.
Compare the top, bottom, and front edges. If one corner sits ahead of the others, correct the shim support before tightening the screws. The box should remain square while the wall gap changes behind it.
For a long installation, recheck the full run after every two or three cabinets. A small error repeated across several boxes can move the final cabinet far beyond its planned layout mark.
How to Join Multiple Cabinets in Alignment
Joining cabinets creates one continuous run, but the connection should not be used to force two misaligned boxes together. Each cabinet needs proper wall support before the joint is tightened.
Set and secure the first cabinet
Position the first cabinet at the marked layout point. Check its level, plumb, height, and front alignment. Add shims behind the mounting rail where the wall is low or uneven, then fasten the box into verified framing or blocking with suitable hardware.
Check the cabinet again after fastening. A screw can pull the box out of square if the shim is too thin or missing at the fastening point.
Align the next box before joining it
Set the neighboring cabinet beside the secured box without fastening the two together immediately. Adjust the second cabinet until its top, front edge, and bottom align with the first.
Clamp the finished surfaces carefully, using cabinet clamps that won’t crush the edges or damage the finish. Run a straightedge across both fronts. If one cabinet projects even slightly, correct it before joining the boxes.
Follow the manufacturer’s instructions for the joining hardware and fastener locations. Keep screws away from hinge plates, drawer-slide hardware, shelf-pin holes, and visible finished panels. Continue checking the full cabinet line instead of focusing only on the seam in front of you.
Correct Uneven Walls Without Bending the Cabinets
Uneven walls are common in remodeling projects. The cabinet line should remain level and plumb, while small gaps between the wall and cabinet receive the correction.
Shim the wall connection, not the cabinet front
If a wall bows inward, place shims behind the mounting rail at the stud or blocking locations. Drive the cabinet screw through the rail and shim, then into the solid support.
Check the cabinet face after each connection. If the cabinet front moves toward the wall as the screw tightens, the support needs adjustment. Loosening the screw without fixing the gap will not solve the problem.
Use scribe molding or a filler to close a narrow, irregular gap after the cabinet is secure. Transfer the wall shape carefully, remove material in small increments, and test-fit the piece before fastening it. Trim should follow the wall while the cabinet remains straight.
Know when shimming is not enough
Excessive shimming can affect cabinet stability, fillers, appliance openings, and the finished height of the room. A large gap may point to a wall that needs repair rather than more shim material.
Stop and reassess if the wall is loose, badly damaged, water-stained, or far out of plumb. A cabinet installer may need to correct the framing or wall surface before mounting the boxes.
For bathroom projects, floating units and heavily loaded vanities need particular attention because the wall must carry the cabinet load. Review cabinet depths and wall-clearance options before finalizing a tight room layout.
Final Checks Before Doors and Countertops
Once the boxes are secured, inspect the entire installation before reinstalling doors and drawers. Check the cabinet tops with a long level and compare the fronts with a straightedge.
Open and close each door gently. Look for gaps that widen from top to bottom, doors that rub, and paired doors that fail to meet evenly. Test every drawer, especially at cabinet joints and near appliances.
Apply gentle pressure to the side of each cabinet. A properly secured box should not rock, pull away from the wall, or move against its neighbor. If a cabinet shifts, correct the mounting or leveling before adjusting the hinges.
In Southwest Florida, use hardware suited to the room’s moisture conditions. Corrosion-resistant fasteners are sensible in damp areas, but the exact product must match the wall assembly, cabinet construction, load, and manufacturer’s instructions. Allow cabinets to acclimate inside the home for 48 to 72 hours when the manufacturer requires it, and seal field-cut edges where moisture may reach them.
FAQ: Leveling Wall Cabinets
Should I make the cabinet follow a crooked wall?
No. Keep the cabinet face level, plumb, and square, then use shims behind the mounting rail to address small gaps. Scribe molding can cover a narrow finished gap, but it cannot correct a cabinet that is out of level.
Can I tighten the screws until the cabinet touches the wall?
Only when the wall is flat at that fastening point and the cabinet remains square. If tightening pulls the front edge out of alignment, add proper support behind the rail instead of applying more force. Fasteners must enter verified studs, blocking, or an approved masonry system.
How do I know whether the box is twisted?
Check more than the top edge. Compare the cabinet front for plumb, place a straightedge across adjoining faces, and inspect the door reveals. A box can appear level on top while its front edge is out of plumb.
What should I check before joining cabinets?
Confirm that both boxes have proper wall support. Then align their tops, bottoms, fronts, and door openings before clamping and joining them. Recheck the full run after the connection is made.
Conclusion
A clean cabinet installation begins with one accurate level reference and continues with frequent checks across the entire run. Shims should correct the wall connection, while the cabinet boxes remain square, plumb, and flush with one another.
Use suitable fasteners in solid framing or blocking, avoid excessive screw pressure, and correct alignment before adjusting doors or installing countertops. When the boxes stay straight, the finished cabinet design looks intentional and performs properly for years.
