 Skip to content

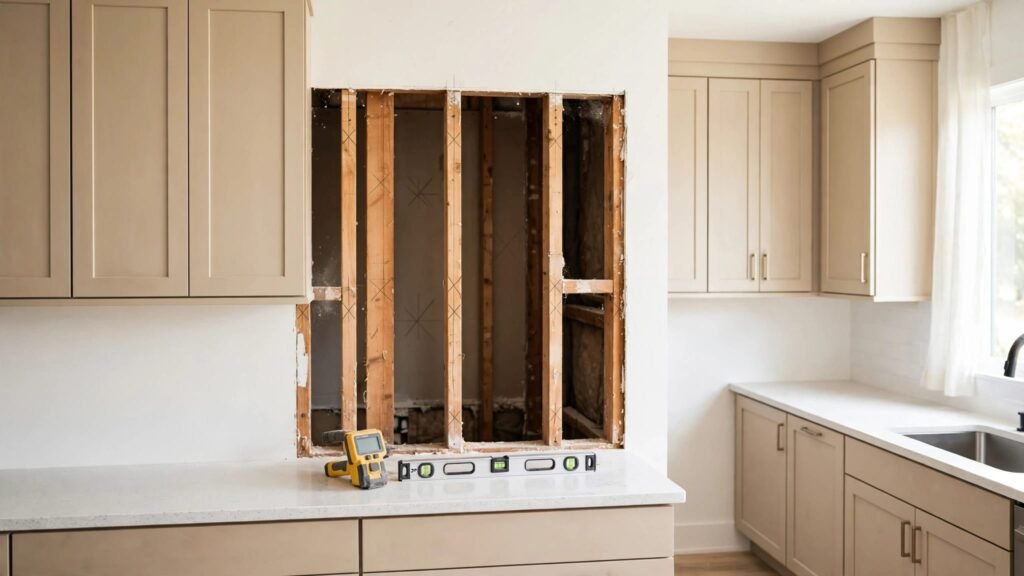
A wall cabinet can look perfectly level while its screws miss the framing behind it. To find wall studs before installing kitchen cabinets, you need more than one clue and a clear picture of what else is inside the wall.
That matters most for uppers loaded with dishes, tall pantry units, and cabinets near plumbing or appliances. Start with the cabinet plan, then confirm each proposed fastening point before drilling.
Start with the cabinet plan, not the stud finder
Stud locations matter only where the cabinets need support. Check the approved layout for cabinet widths, wall-cabinet heights, fillers, appliance openings, and any decorative hood or open shelving. Then look at the cabinets’ installation instructions to identify their mounting rails or reinforced fastening areas.
Mark the planned cabinet run on the wall with painter’s tape. Use a level to establish reference lines, and note where the top and bottom mounting rails will sit. Don’t assume the ceiling or an existing countertop is level.
A layout change can move a fastening point. A wider hood, taller upper cabinet, or relocated pantry may call for different backing. Before the order is final, compare the drawings with actual wall dimensions and appliance specifications. TEC Cabinetry Plus’s kitchen cabinet measurement guide covers the openings and utility locations that belong on that drawing.
Keep the cabinet elevation beside you as you search. It helps distinguish useful framing from a stud that falls outside the planned mounting area.
Identify what kind of wall is behind the finish
A stud finder can suggest where framing sits, but it can’t tell you whether that framing is suitable for a loaded cabinet. First, establish whether you’re dealing with wood studs, steel studs, masonry, or an older wall with several finish layers.
Wood and steel framing need different fastening plans
On a conventional framed wall, look for vertical framing members beneath the drywall. Wood provides a different screw-holding surface than thin steel. If a detector finds metal, it may have found a steel stud, a drywall fastener, corner bead, or a pipe.
Some Fort Myers interiors use light-gauge steel partitions. Finding a steel flange doesn’t prove that it can support the planned cabinet and contents. The installer must assess the wall assembly and use a fastening method appropriate to the cabinet manufacturer’s requirements.
Masonry and older finishes can change the search
A concrete block wall may have furring strips or other material between the block and the interior finish. Those strips aren’t automatically suitable cabinet supports. Masonry calls for an anchoring plan matched to the block, finish layers, and cabinet load.
Plaster can also complicate electronic readings, particularly when metal lath sits beneath it. If you can’t establish the wall construction, pause rather than treating a detector reading as permission to drill.
How to find wall studs using independent clues
Gather a stud finder suited to the wall surface, a strong magnet, painter’s tape, a pencil, and a level. Check the detector’s instructions before scanning. Sensitivity, calibration, and operating steps differ between models.
Scan across the proposed cabinet mounting area
- Mark the height of each cabinet mounting rail on painter’s tape.
- Run the detector horizontally across the wall at the first rail height. When it indicates an edge, mark that point. Continue until you find the other apparent edge.
- Scan the same area from the opposite direction. Compare the marks, then repeat near another rail height.
If both edges appear consistently, mark a possible center between them. A single beep or light isn’t a verified stud. Changes in wall thickness, tile, plumbing, and metal objects can all affect a reading.
Compare the scan with a magnet and visible clues
Move a magnet slowly across the suspected location. It may catch on drywall screw heads, which often form a vertical line along a stud. Mark several possible fasteners rather than trusting one isolated magnetic spot.
Nearby outlets, switches, and corners can help you understand the wall, but they don’t establish a stud center. Boxes may sit beside framing or attach through other means. Compare all the clues at the heights where the cabinet will actually fasten.
Verify the location before treating it as support
To find wall studs reliably enough for cabinet planning, map a vertical line rather than collecting dots. A candidate that appears at one height but disappears near the mounting rail needs another look.
Check the suspected stud along its length
Use a level to extend each candidate centerline through the proposed cabinet area. Rescan along that line at upper and lower mounting heights. Then compare the electronic reading with any vertical pattern of magnetic fastener heads.
Don’t extend the line blindly past a window, doorway, soffit, or remodeled section. Framing around openings can change direction, and added blocking may run horizontally. Mark those areas separately so an installer doesn’t mistake blocking for a full-height stud.
A convincing stud location at countertop height doesn’t confirm a fastening point at an upper cabinet’s mounting rail.
Confirm what the fastener would enter
Before any exploratory pilot hole, establish that the spot is clear of concealed services. Where the wall is safely accessible, an experienced installer can use a small test hole at a planned fastening location to check the material behind the finish. A small hole that meets drywall alone, thin metal, or an unexpected void calls for reassessment, not a longer screw.
Record verified locations on tape and on the cabinet drawing. Label uncertain spots as uncertain. If an opening is already exposed during remodeling, inspect the framing directly instead of relying on indirect readings.
Check for wiring and plumbing before drilling
A confirmed stud isn’t necessarily a safe place for a screw. Electrical cable can pass through framing, while water lines, drains, vents, and ducts may run close to cabinet mounting areas.
Map the services you can identify
Mark outlets, switches, light fixtures, plumbing connections, and appliance locations on the wall drawing. Note what’s on the opposite side of the wall, too. A bathroom, laundry area, or adjacent appliance can explain a concealed pipe or cable route.
If the wall is open before drywall, check where services cross studs and where protective plates have been installed. Photograph the framing with a tape measure visible. Label stud centers and blocking heights above the finished floor, then save the images with the approved cabinet drawings.
Stop when a proposed hole is uncertain
Don’t drill through a protective plate or move it to make room for a cabinet screw. A plate may protect wiring or plumbing directly behind the finish. Likewise, a magnet that finds metal near a sink or electrical box needs investigation before drilling.
Turn off power or water when the work area requires it, but don’t treat a shutoff as proof that the wall is clear. If you can’t trace a utility route or identify an obstruction, have a qualified professional inspect it. The fastening point can often be revised before a pipe or cable is damaged.
Transfer verified marks to the cabinet layout
Once you’ve mapped the wall, compare each verified support point with the cabinet’s actual mounting rails. That comparison matters more than whether a stud falls near the middle of a cabinet.
Mark the fastening area, not only the cabinet edges
Measure the rail positions on the cabinet and transfer them to the wall elevation. Identify where each rail crosses suitable framing or installed blocking. Check both upper and lower fastening locations where the cabinet instructions require them.
This is also the time to confirm fillers, finished panels, and appliance clearances. A cabinet design with room for an uneven corner can be easier to align than one pressed tightly against it. For a broader room-readiness check, review how to prepare for cabinet installation before the cabinets arrive.
Resolve missing support before installation
If the rail locations don’t meet suitable framing, revise the support plan. During an open-wall remodel, properly secured blocking can be placed where the approved cabinet elevation requires it. Check that it sits flush with the framing and spans the planned fastening locations before drywall goes up.
For a closed wall, an installer may need to open the finish or use another engineered support approach. Don’t expect neighboring cabinets, a temporary ledger, or drywall alone to carry an inadequately anchored upper cabinet. The Fort Myers kitchen cabinet buying guide also calls for appropriate anchoring into studs or blocking and corrosion-resistant screws.
Know when to bring in an installer
Professional help makes sense when the wall contains steel framing of unknown capacity, masonry behind a finish, damaged plaster, or no clear support at the planned rails. It also matters for heavy uppers, tall units, floating vanities, and open shelves intended to hold substantial weight.
Ask the installer to identify the wall assembly, suitable support points, concealed utilities, and the cabinet manufacturer’s fastening requirements. Screw type, length, quantity, and placement depend on those details. Guessing based on a screw that worked elsewhere in the house can leave a cabinet poorly supported or damage something behind it.
Key Takeaways
- Start with the approved cabinet layout and locate the mounting rails before searching the wall.
- Compare detector readings with other clues, then verify candidates at each planned fastening height.
- Identify wiring, plumbing, ducts, and protective plates before making any hole.
- If suitable support doesn’t meet the rails, settle the backing plan before installation.
Common questions about finding cabinet studs
Can I rely on a stud finder alone?
No. A detector gives you a candidate location, not confirmation of safe or suitable support. Rescan from both directions, check at more than one height, and compare the result with other available clues.
What if there are no studs behind a mounting rail?
Don’t shift a screw into drywall and hope the neighboring cabinet will hold it. Have the installer assess whether the wall needs properly attached blocking or another support method suited to its construction.
Do base cabinets need the same wall check?
Base cabinets generally carry their weight on the floor, but they still need appropriate wall attachment to keep the run stable. Tall cabinets need a careful support review because their height and load differ from a standard base unit.
A secure cabinet begins behind the wall
The stud finder is only the start. Verified support means the fastening location matches the cabinet rail, the wall construction is suitable, and the path is clear of utilities.
Make those checks before the cabinets go up. Once the boxes cover the wall, a missed support point is much harder to correct.
