
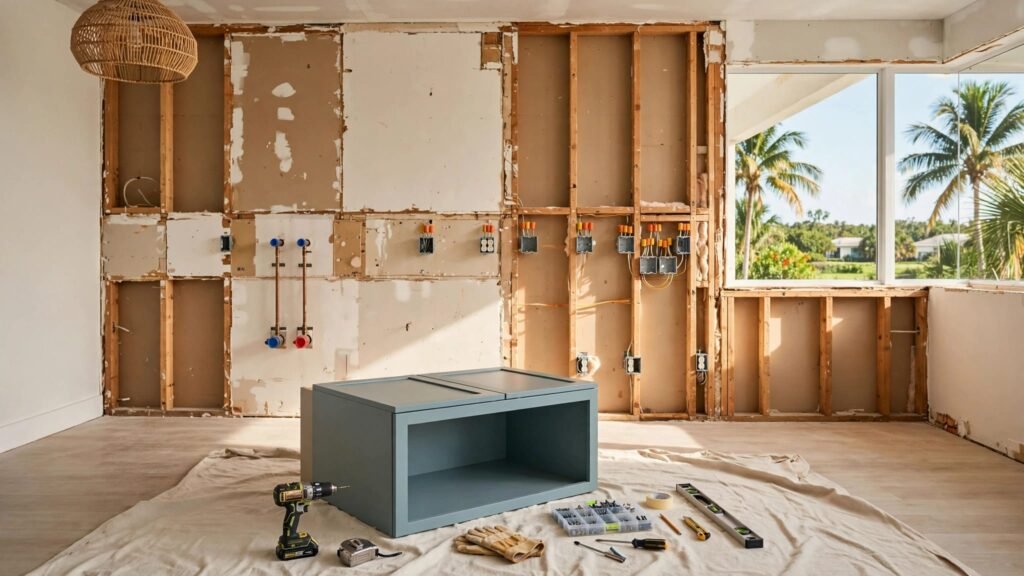
An old cabinet can look ready to lift out while a pipe, wire, or hidden screw still holds it in place. That makes careful preparation the most important part of kitchen cabinet removal, especially when you want the walls and floors ready for new cabinetry.
Before anyone loosens a cabinet, settle the new layout, assign utility work to the right trades, and protect the room. Then the existing units can come out without turning a cabinet replacement into an avoidable wall repair.
Step 1: Set the remodel plan before removal begins
Confirm what will replace the old cabinets
Your new cabinet design determines what needs to happen to the walls, floor, and utility connections. Record the existing cabinet locations and note anything that will change, including appliance positions, sink placement, and the height of wall cabinets.
Photograph the room before removal. Get clear views of the sink base, dishwasher opening, outlets, vents, soffits, and any plumbing visible inside cabinets. Keep appliance model information with the plan. A new refrigerator or range may need different clearances even if it occupies the same general spot.
If you’re still deciding on the layout, a cabinet design consultation for your remodel can help identify fixed features, such as windows and utility locations, before demolition commits you to a plan.
Put each job in writing
Confirm who will remove the cabinets, disconnect appliances, handle plumbing and electrical work, take away debris, and repair exposed walls. Cabinet installation and old-cabinet removal aren’t always part of the same agreement.
Also ask who will address surprises, such as damaged drywall behind a sink base. A written scope makes it easier to schedule the plumber, electrician, countertop crew, and cabinet installers in the right order. Don’t assume an installer will make utility changes because those connections pass through a cabinet.
Step 2: Make the work area safe
Have utilities handled before cabinets move
A sink cabinet can conceal supply lines, a drain, a disposal connection, and wiring. Nearby cabinets may cover dishwasher connections or serve as a path for a hood cable. Treat every connection as active until the appropriate trade confirms otherwise.
Arrange for power and water to be shut off as needed for the affected work, then have the relevant connections safely disconnected or secured. Use a qualified plumber or electrician for work beyond the agreed cabinet-removal scope. If gas appliances or lines are involved, leave that work to a qualified professional.
Don’t rely on a wall switch, an appliance control, or an old valve position as proof that a connection is safe. A valve that sticks or shows corrosion needs a plumber’s assessment, not extra force.
Check access, permits, and building rules
Cabinet replacement can be part of a larger project that moves a sink, adds outlets, or changes a wall. Those changes may affect the permit path. A licensed contractor or the building department can determine what applies; a cabinet quote doesn’t make that decision. Review Fort Myers kitchen remodel permit requirements before authorizing layout changes.
If you live in a condo, confirm building rules for contractor access, work hours, elevator protection, and debris removal. These details affect when the room can be cleared, even when the cabinet plan itself stays simple.
Step 3: Empty and protect the kitchen
Clear every cabinet and drawer, including the small items tucked above the refrigerator or behind the sink. Pack dishes and pantry goods away from the work zone. Remove countertop appliances, wall decorations, and nearby fragile items so the crew has an open route.
Cover floors along the full travel path, not only beneath the cabinets. Choose protection suited to your tile, wood, or luxury vinyl, and keep grit from getting trapped underneath. Protect appliance faces, doorways, and surfaces that will remain. In a Fort Myers home, wet shoes or sand carried in from outside can scratch a floor before cabinet work starts.
Safety glasses, work gloves, and appropriate dust protection belong in the work area. Keep children and pets out, and plan where removed units can sit without blocking an exit. If a cabinet is too large to carry through the planned route, sort that out before it comes off the wall.
Step 4: Detach the existing cabinets with the wall in mind
Find the connections that hold each unit
Cabinets may connect to wall framing, neighboring cabinets, trim, a countertop, or floor fastening. Look inside the boxes and at adjoining face frames for visible fasteners. A painted joint can also hide where trim or caulk meets the wall.
The goal is to release those connections rather than force the cabinet away. Remove fasteners you can positively identify, and separate visible finish joints carefully. Keep any scoring at the surface; don’t cut into an occupied wall cavity. Pipes and cables may sit close behind drywall.
Never use the wall as a lever point or pull harder because a box won’t move. A cabinet that stays put may have another screw, a concealed bracket, or an attachment beneath it. Stop and locate the resistance before continuing.
Control the weight as each box comes free
Wall cabinets need support before their final fasteners release. An empty upper can still be awkward, especially over a range opening or in a corner. Use enough people to support and guide it. Leave an oversized or uncertain unit to a cabinet crew.
Doors, drawers, and shelves can come off where their hardware allows, making a box easier to handle. Label pieces and keep their hardware together if you plan to reuse or donate the cabinets. Set removed boxes down gently instead of dragging them across protected flooring.
Base cabinets need the same patience. Check adjoining units and the floor before attempting to lift one away. Countertops and backsplashes may require separate trades, particularly when stone, tile, or heavy sections are involved. Coordinate that work rather than assuming a cabinet can be pulled free beneath them.
Step 5: Stop for conditions the old cabinets concealed
Treat moisture damage as a repair, not cleanup
Once the sink base and adjacent units are out, inspect cabinet backs, drywall, flooring, and visible connections. Look for staining, swollen material, damp areas, corrosion, or a leak around a valve. In Southwest Florida’s humid conditions, enclosing a damp wall behind new cabinets can leave an active problem out of sight.
Stop work in that area if you find moisture. Have the source assessed and repaired, then let the affected materials dry and receive any necessary repairs before installation. Photograph the condition while it’s exposed and share it with your contractor and cabinet team.
Leave questionable wiring and materials alone
Unexpected cables, loose electrical boxes, unfamiliar pipes, or a connection hidden behind a panel need professional attention. Don’t drill, cut, or pull around them to keep the removal moving. An electrician or plumber can identify what must remain accessible and what needs correction.
Older finishes may also contain hazardous materials. If you suspect lead-based paint, asbestos-containing flooring or adhesive, or significant mold contamination, stop disturbing the area and seek qualified assessment. Homes built before 1978 can present lead-paint concerns. Avoid sanding or breaking questionable material while you wait for guidance.
A cabinet coming off the wall can reveal a condition that changes the installation plan. Resolve the condition before covering it with a new box.
Step 6: Clear debris and confirm the removal scope
Keep reusable cabinet pieces separate from broken trim, fasteners, and damaged material. Sound cabinets may suit reuse or donation if their condition and dimensions make them practical to transport. Water-damaged pieces need a different disposal plan.
Ask where removed cabinets will be staged and who will arrange haul-away. Also confirm whether the price includes wall patching, floor-edge repairs, and cleanup. One estimate may include those tasks, while another covers only installation. Comparing cabinet installation estimates is easier when each bidder prices the same responsibilities.
Before the crew leaves, check for loose screws and debris in the work path. Keep floor protection in place if other trades still need access, but replace torn or gritty covering rather than carrying it into the next phase.
Step 7: Check the room before new cabinets arrive
An empty kitchen isn’t automatically ready for installation. Compare the exposed room with the approved plan. Check wall surfaces, appliance openings, utility locations, and the places where new cabinets will need secure support.
Tell your installer about anything the old boxes concealed. Photos of open walls can help the crew understand utility routes and support locations. If the layout changed, confirm that fillers, corners, appliance clearances, and sink-base openings still work before cabinetry is set.
Wall repairs, approved utility changes, and any required inspections belong before the new units cover those areas. The room should also be dry, clear of old cabinetry, and accessible for delivery. Use a cabinet installation prep checklist to review the handoff with your installer.
A final walk-through prevents small uncertainties from becoming installation-day decisions. Confirm who will protect the floor during delivery, where the new boxes will be staged, and which appliances need to be on site for fit checks.
Key Takeaways
- Set the new layout and assign removal, utility, repair, and cleanup responsibilities before work starts.
- Have affected plumbing, electrical, and gas connections handled by qualified trades.
- Protect the full work route, support heavy cabinets, and release fasteners instead of forcing boxes off the wall.
- Pause for hidden damage or questionable materials, then resolve those conditions before installation.
Frequently Asked Questions
Can I remove kitchen cabinets myself?
Some homeowners can help with emptying cabinets, protecting nearby surfaces, labeling reusable parts, and clearing a path. Detaching cabinets demands more care when units are heavy, attached to counters, or close to utilities. Arrange qualified help when you can’t confirm how a unit is supported or what lies behind it.
Don’t treat appliance or utility disconnection as part of a basic cabinet-removal task. Those connections need the appropriate professional review before the surrounding cabinet moves.
What if the new cabinets use a different footprint?
Expect exposed floor edges, unfinished paint, or wall areas the old cabinets covered. Share those conditions with your designer and installer before installation. The team can then confirm whether the plan needs repairs, fillers, or other adjustments.
A changed footprint can also affect countertop measurements and appliance clearances. Measure against the actual room after removal rather than relying only on the outlines left by the old boxes.
A clean start for the new kitchen
The old cabinets should leave behind a room the installation crew can assess, not a collection of hidden problems. Safe utility handoffs, controlled removal, and prompt repairs protect the surfaces your new kitchen depends on.
That first cabinet may look ready to lift out. Check what holds it and what connects to it before anyone moves it.