
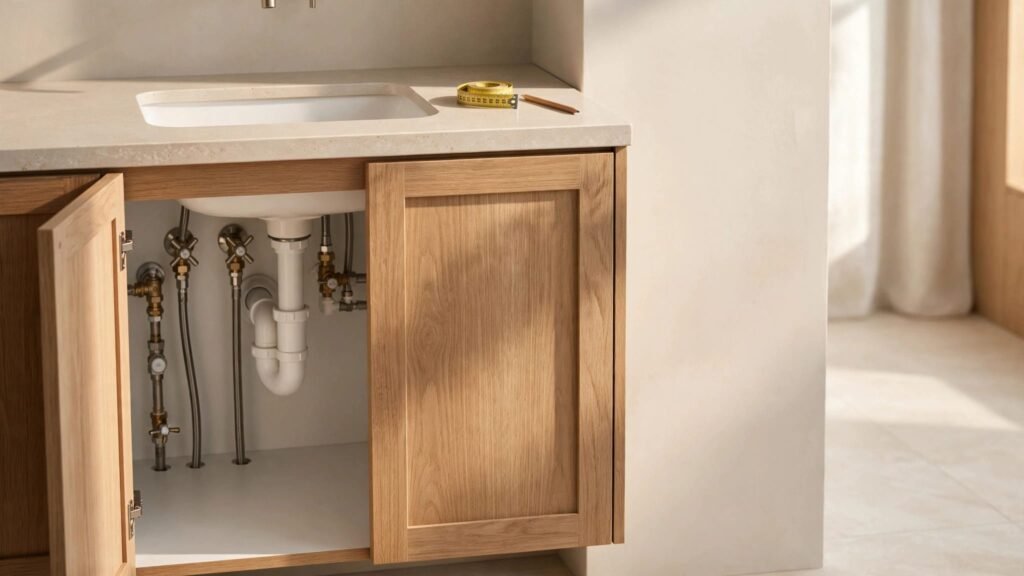
A new sink cabinet can fit the wall perfectly and still leave you unable to turn off the water. Successful cabinet installation around existing plumbing depends on more than making space for the pipes. You need room to operate valves, inspect connections, and reach them when a repair can’t wait.
The best time to solve those problems is before the cabinets are ordered. Start by mapping what’s already behind the sink.
Map the plumbing before choosing cabinets
Record every connection, including the easy-to-miss ones
Open the existing sink cabinet and photograph the back wall, floor, and each connection. Mark the hot and cold supplies, drain, shutoff valves, and dishwasher line. Add any filter, disposal, instant hot-water unit, or refrigerator water line that shares the cabinet.
Check beyond the sink, too. A tall cabinet or bathroom linen tower could cover a valve, drain cleanout, or access point that used to sit in the open. Photos taken before demolition help the installer identify those locations after the old cabinets are gone.
During cabinet installation preparation, tell the crew about utilities hidden behind the existing units. That gives them time to review the fastening locations as well as the cabinet openings.
Check condition before covering the wall
Look for damp drywall, stained cabinet floors, corrosion, or signs that a valve has leaked. New cabinetry shouldn’t conceal an active moisture problem. Have the source repaired and the area dried before installation continues.
Don’t force a stiff or corroded shutoff to test it. Ask a licensed plumber to assess it while the wall and connections are accessible. Replacing a questionable valve is easier to discuss before a finished cabinet surrounds it.
Plan cabinet installation around existing plumbing
Fit the whole sink area, not only the drain
A pipe can clear a cabinet back yet collide with the sink bowl, disposal, shelf, or door hardware. Compare the cabinet’s interior dimensions with the fixtures and appliances that will occupy it. A kitchen sink base may also need space for dishwasher connections and a filter cartridge that you can remove.
If you’re keeping the countertop, its existing sink opening fixes the sink’s position. The replacement base must fit beneath that opening while accommodating the bowl and plumbing. Review how to fit a cabinet beneath an existing sink cutout before committing to a new layout.
Check what happens when storage moves
Bathroom vanities need special attention because drawers often travel through the space occupied by a drain or shutoff. Measure the drawer box and slides, then check their full travel path. A closed drawer can look clear even when its rear hits a valve as it opens.
An open sink base, a removable shelf, or a different drawer layout may solve the conflict. Discuss those options during cabinet design, rather than planning to cut into a delivered drawer. Removing material near a slide or structural joint can weaken the cabinet.
Measure openings from the cabinet’s installed position
Establish fixed reference points
Measure each pipe and valve center from the same reference points shown on the cabinet plan. Record horizontal distance from a marked cabinet edge or wall corner, and height from the finished floor. Include the pipe’s outside diameter and how far fittings project into the room.
Then confirm where the cabinet back will sit. Some cabinet backs are set inward from the rear edge, so a measurement taken only at the wall may not describe where a pipe meets the panel. Leveling and shims can also change the final position.
The kitchen cabinet measurement guide can help you record utility locations alongside the room and appliance dimensions. Verify the final measurements on site before cutting.
A hole marked while a cabinet rests on the floor can miss its pipe after the installer raises and levels the cabinet.
Mark the full obstruction
For each opening, mark the pipe, any surrounding fitting, and the space needed to position the cabinet without forcing it against the plumbing. A valve body may be wider than its supply pipe. Its handle also needs room to turn once the sink and storage are in place.
Transfer measurements to the cabinet back using a square. Mark each center first, then draw the proposed opening around it. Compare the marks with the actual pipes before making a cut. If the cabinet has already arrived, a cardboard template is useful for checking an irregular group of connections without repeatedly moving a heavy box.
Cut cabinet backs without damaging pipes
Choose the opening that matches the obstruction
For a simple, isolated pipe, a hole saw or drill bit suited to the cabinet material may make a clean opening. A jigsaw can handle a larger shape or several closely grouped lines. Clamp a loose cabinet panel securely and support it while cutting, following the cabinet manufacturer’s instructions.
Cut away from the plumbing whenever possible. Mark and cut a loose back panel on a stable work surface, then test its fit. Don’t drive a saw, drill, or oscillating blade toward an occupied wall cavity. Pipes and electrical cables may sit close behind the surface.
An installed shutoff valve or bulky fitting may not pass through a small round hole. Don’t disconnect a supply line simply to slide a cabinet over it. Ask the installer and plumber whether a larger service opening, removable back, or plumbing adjustment is appropriate.
Protect the finished cabinet
Remove rough edges and seal exposed cabinet material as the manufacturer recommends, particularly beneath sinks and in bathrooms. Raw edges can absorb moisture from splashes or slow drips.
Also protect exposed pipes while positioning the box. Lift and guide the cabinet into place rather than dragging a cut edge across a supply line. Never use plumbing to push a cabinet into alignment. If the cabinet won’t sit correctly without pressing on a pipe, stop and reassess the fit.
Leave space to operate and repair shutoff valves
Size access for hands and tools
A visible valve isn’t necessarily a usable valve. Open the cabinet door and check whether you can reach the handle and turn it without removing a fixed component. Then consider whether a plumber could reach the nearby connection with a tool.
A tightly fitted opening around a valve may leave no room to replace it later. Keep disposals, fixed organizers, and deep storage bins out of its working area. The same principle applies to drain traps and filter cartridges that need routine service.
For planning ideas, see how cabinet access panels preserve plumbing access without leaving every connection exposed.
Make concealed access genuinely removable
A removable cabinet back, lift-out shelf, or accessible toe-kick panel can provide a tidy finish where plumbing sits behind or below storage. Its location should be clear, and an adult should be able to remove it with ordinary tools.
Avoid permanently gluing or caulking a panel intended for service. Also check that a shelf, drawer, or appliance doesn’t block the opening once everything is installed. Access that works only in an empty room won’t help much during a leak.
Secure the cabinet without striking hidden utilities
Find appropriate support points
Mark known pipe routes, outlets, and other utilities before drilling. Don’t assume the wall is clear just because a supply line emerges several inches away. Ask the installer to verify the mounting surface and select fasteners appropriate to the cabinet and wall construction.
A sink base needs to sit level and secure without relying on the pipes for support. Shims can correct an uneven floor or wall; forcing the box flat against an obstruction can’t. Avoid cutting through cabinet rails or other load-bearing parts unless the manufacturer approves the modification.
Wall-mounted vanities call for added care. Their mounting support carries the cabinet and its contents, so the installer must verify the wall structure before fastening one.
Recheck the openings after fastening
A cabinet can shift slightly as it is leveled and secured. Before the work moves on, inspect every opening again. Pipes should pass through without pressure from the cabinet back, and valve handles should move freely.
Open doors and extend drawers fully. Then check whether planned shelves, pull-outs, and appliances still leave a path to the plumbing. This final fit check matters as much as the measurements made before cutting.
Bring in a licensed plumber when the layout conflicts
Cabinet installers can identify an interference, but they shouldn’t improvise changes to water, drain, vent, or gas lines. Call a licensed plumber when a valve must move, a drain misses the sink base, an old connection is corroded, or the new cabinet prevents proper service access.
The same applies when a proposed cut would remove too much of the cabinet back or compromise a drawer. A plumbing change or a different cabinet configuration may be the better choice. Share the final cabinet dimensions, sink specifications, and photos so the plumber can review the actual conflict.
If the project requires plumbing changes, coordinate them before cabinets conceal the work. Your contractor or licensed trade can confirm which permits, tests, and inspections apply locally. A professional cabinet layout review can also catch conflicts between the planned cabinetry and fixed utility locations before the order is final.
Inspect the finished cabinet for leaks and access
Once the plumbing is connected, have the responsible professional check the connections and test the fixtures. Look inside the cabinet while water runs, and check around the drain, supply connections, and dishwasher line for dampness. Inspect the cabinet floor and corners again after the sink has been used.
A removable under-sink liner can make cleanup easier, but it shouldn’t hide a persistent drip. Keep cleaning supplies from pressing against pipes or blocking shutoffs. Over time, look for stains, swelling, soft spots, or a musty odor.
Finally, make sure everyone in the household knows which valves shut off the sink’s water. Clear access turns that knowledge into something useful.
A good fit leaves room for the next repair
The cabinet should protect and organize the space without trapping the plumbing inside it. Accurate measurements, careful cutouts, secure mounting, and reachable shutoffs make that possible.
Before approving the finished installation, open every door and drawer, turn each accessible valve, and look for leaks. A cabinet that fits the pipes must also let you care for them.