
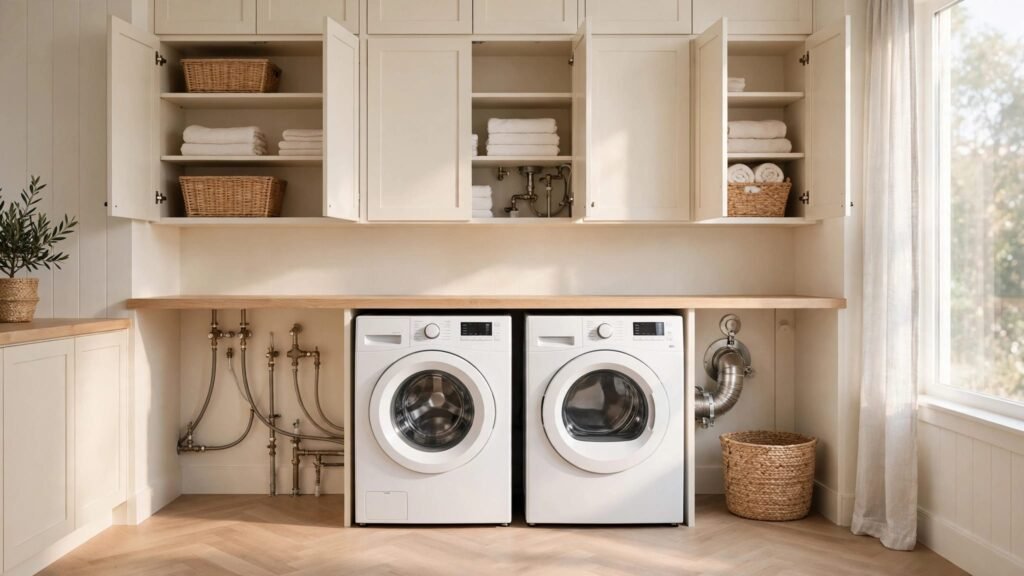
A laundry room can look polished on a floor plan and still fail on installation day. Washer dryer clearances determine whether doors open, hoses stay accessible, and cabinets survive daily use.
Appliance dimensions are only the starting point. Vent elbows, water valves, baseboards, outlet locations, and cabinet door swings all claim space. Plan the room around the exact machines you will install, then build cabinetry around the remaining working area.
Start With Washer Dryer Clearances, Not Cabinet Sizes
A 27-inch washer or dryer does not fit a 27-inch cabinet opening. The published appliance width measures the machine body, while real installations need room for movement, hookups, vibration, and service.
Whirlpool’s general sizing guidance recommends about 1 inch on each side, 6 inches behind the machines, and 4 feet in front of front-load models. Those are useful planning allowances, but they are not universal installation rules.
Separate minimum requirements from smart planning space
Some current Whirlpool installation sheets allow 0 inches at the sides, with an added 1 inch recommended around the appliance. Certain GE models also list 0-inch side or rear minimums in open installations. That doesn’t mean a tight cabinet enclosure is the best choice.
A nominal minimum may work only when the vent exits in the right place, hoses route cleanly, and an installer can still reach every connection. Cabinetry is expensive to alter later, so leave practical breathing room where the room allows it.
A dryer may meet its listed rear clearance while still needing more depth for a rigid duct elbow, a plug, or a gas connection.
Measure the complete installation footprint
Before finalizing a cabinet order, record more than width, height, and depth. Check the appliance specification sheet and installation manual for clearances, door swing, vent direction, electrical requirements, and utility locations.
Measure these items in the actual room:
- The appliance body, including any handles, control panels, and rear projections.
- Water valves, drain standpipe, gas shutoff, dryer receptacle, and dryer exhaust connection.
- Baseboard thickness, wall trim, door casing, and any raised floor transition.
- The path needed to bring the machines through the home and into the laundry room.
Exact dimensions depend on the appliance model, cabinet construction, hookups, venting, and local requirements. Check the installation manual and local code before construction begins.
Size the Cabinet Opening for Access
Cabinets should frame the appliances without pinching them. In a side-by-side layout, an opening often looks best when the machines sit slightly proud of nearby cabinet faces rather than buried under a deep countertop.
Use this table as a design starting point, then replace these allowances with the requirements in your appliance manuals.
| Location | Practical planning allowance | Why it matters |
|---|---|---|
| Each appliance side | About 1 inch | Reduces rubbing, vibration transfer, and installation headaches |
| Behind washer and dryer | About 6 inches | Leaves room for hoses, plugs, valves, and venting |
| In front of front-load units | About 48 inches | Allows doors to open and leaves loading space |
| Above a top-load washer | About 24 inches | Gives the lid room to open |
| Above front-load appliances | Model-dependent | Supports a counter or upper cabinets without blocking service access |
The larger gaps are often recommendations, not building-code mandates. Still, they make a laundry room far easier to live with.
Allow for side panels and cabinet fillers
Cabinet boxes have material thickness. A finished side panel, filler strip, countertop overhang, or decorative end panel can reduce an opening by more than expected.
For example, two 3/4-inch side panels remove 1 1/2 inches of usable width. A pair of machines that appear to need 54 inches may need a 56-inch or wider framed bay once panels, side spacing, and movement room are included.
Keep cabinet doors clear of appliance controls and handles. A shallow pull-out between the machines may seem useful, but it often complicates service and traps lint.
Protect countertop edges near vibrating machines
A counter installed over front-load machines needs enough support that it does not rest on either appliance. Leave the clearance required by the manufacturer, and support the counter from wall cleats, side cabinets, or purpose-built brackets.
A small finished gap between the counter and appliance sides looks intentional. It also prevents a spinning washer from transferring movement into the cabinet design.
Plan Room in Front of the Machines
The space in front of laundry appliances becomes a work zone, not leftover floor area. You need room to sort clothing, pull out baskets, open doors, and access the machines if something goes wrong.
Front-load washers and dryers need their doors to swing fully open. Whirlpool recommends roughly 4 feet of open space in front for loading and unloading. That figure is especially helpful when an island, folding table, or opposing cabinet run is part of the plan.
Front-load doors need a clear landing area
Measure the swing of both appliance doors before choosing their placement. Many front-load doors can reverse, though not every model allows it. Set the washer and dryer so open doors do not block a passage, hit a cabinet pull, or collide with each other.
If a laundry room has a narrow aisle, choose shallow-depth cabinetry across from the appliances. A 12-inch to 15-inch deep storage cabinet may keep the walkway useful where a standard 24-inch base cabinet would crowd it.
Also consider how you carry a basket. A clear route from washer to dryer makes the room feel more comfortable every week.
Top-load washers need open space above
A top-load washer changes the cabinet plan because the lid needs room to rise. Whirlpool suggests allowing at least 2 feet above the machine for lid access.
Avoid a fixed countertop directly over a top-loader. Upper cabinets can work, but mount them high enough to clear the raised lid and leave access to the water connections behind the machine.
In a compact room, a shelf above the washer may be possible. Keep it shallow and high, and verify the machine’s manual before installation.
Leave Depth for Vents, Hoses, and Shutoffs
Rear clearance is where attractive plans most often run into trouble. The cabinet depth may look correct on paper, yet the dryer vent or washer hose forces the appliance several inches forward.
A standard rear dryer outlet with an elbow can require much more space than a straight, aligned exhaust connection. Whirlpool notes that many dryer installations need at least 5 1/2 inches behind the dryer for exhaust venting with elbows.
Dryer vent routing changes the real clearance
The dryer exhaust path should be planned before cabinets are ordered. A short, direct route usually needs less room and performs better than a long, sharply bent duct run.
Some model instructions permit 0 inches at the rear when the home’s exhaust connection aligns directly with the dryer outlet. Rear duct routing, an offset connection, or a recessed box can change that measurement.
Use rigid metal duct where required by the installation instructions and local rules. Do not let a cabinet back or countertop support block access to the duct connection. In Southwest Florida, local permitting and inspection may focus on exhaust termination, electrical work, and gas piping.
Water connections need a reachable service point
Washers need hot and cold supply hoses, a drain hose, and accessible shutoff valves. The drain standpipe or laundry sink connection can dictate the appliance position more than the cabinet boxes do.
Place valves where you can reach them without removing an upper cabinet, countertop, or machine. Recessed washer outlet boxes can conserve depth, but their location must work with the machine’s hose-routing instructions.
Gas dryers need an accessible shutoff valve and flexible connector. Their true rear clearance often exceeds the appliance body’s minimum, so confirm the gas layout with the installer and local code before closing walls.
Closet and Stacked Laundry Cabinets Need Ventilation
A laundry closet needs more than a pair of doors. Tight enclosures can limit airflow, restrict service access, and violate the appliance manufacturer’s instructions.
GE installation documents for some closet installations require louvered or otherwise ventilated doors. The stated open area varies by model and configuration. Examples include 60 square inches for some single-appliance closets and 120 square inches when both washer and dryer occupy the enclosure.
Use the appliance manual for door openings
Ventilation opening requirements are not decorative details. They can be part of the listed installation requirements for the exact appliance.
Some GE unitized guides cite 72 square inches for certain 24-inch models and 120 square inches for 27-inch models. Whirlpool also identifies closet-door vent openings as minimum requirements in applicable dimension guides.
Do not copy a vent size from another machine or assume a full-height door solves the issue. Check whether the manual calls for upper and lower openings, louvered doors, or a stated net free area.
Stacked units need service space above and beside them
Stacked washers and dryers save floor space, but they increase the importance of upper access. Keep surrounding cabinets out of the path needed to remove a dryer, reach a power connection, or service a stacking kit.
A tall cabinet beside a stacked unit can add useful storage. However, leave the side clearance required by the manufacturer and avoid locking the machines into a niche with no removal path.
Pedestals also change the final height, door swing, and counter alignment. Include them in every measurement, rather than treating them as an afterthought.
Build Cabinets Around the Way You Do Laundry
Good cabinetry turns clearance space into an organized room without taking it away. Base cabinets and a folding counter work well beside front-load machines, while tall storage can hold detergents, cleaning tools, and bulky linens.
For layout inspiration beyond appliance bays, explore Fort Myers laundry room cabinets. The right arrangement balances storage needs with the space required to install and maintain appliances.
Choose cabinets that tolerate moisture and daily wear
Laundry rooms handle damp clothing, detergent drips, pet supplies, and cleaning products. Select durable cabinet boxes, sealed edges, and finishes that wipe clean easily.
Wall cabinets above a counter should not interfere with top-load lids or a dryer vent route. In a humid Florida home, keep storage for towels and linens away from areas that may collect condensation or plumbing leaks.
A pull-out hamper can keep clothes contained, but don’t place it where an open appliance door blocks it. The best storage follows the room’s traffic pattern.
Keep access panels and removable pieces practical
A finished panel can hide plumbing or dryer ductwork while preserving access. Use screws or magnetic catches where a future repair may require entry, instead of permanently sealing the area.
Cabinet installers, appliance installers, electricians, plumbers, and HVAC professionals all need room to complete their work. Coordinate those trades before the final template and cabinet installation date.
Careful cabinet design makes the laundry room feel built-in without turning routine maintenance into a demolition project.
Final Measurements Make the Difference
Beautiful cabinets cannot fix an appliance bay that is too narrow or too shallow. Start with the manufacturer’s installation sheet, then allow room for real-world hoses, vents, door swings, and service access.
The most successful washer dryer clearances protect both the appliances and the cabinetry around them. When every connection remains reachable, the room stays useful long after installation day.