
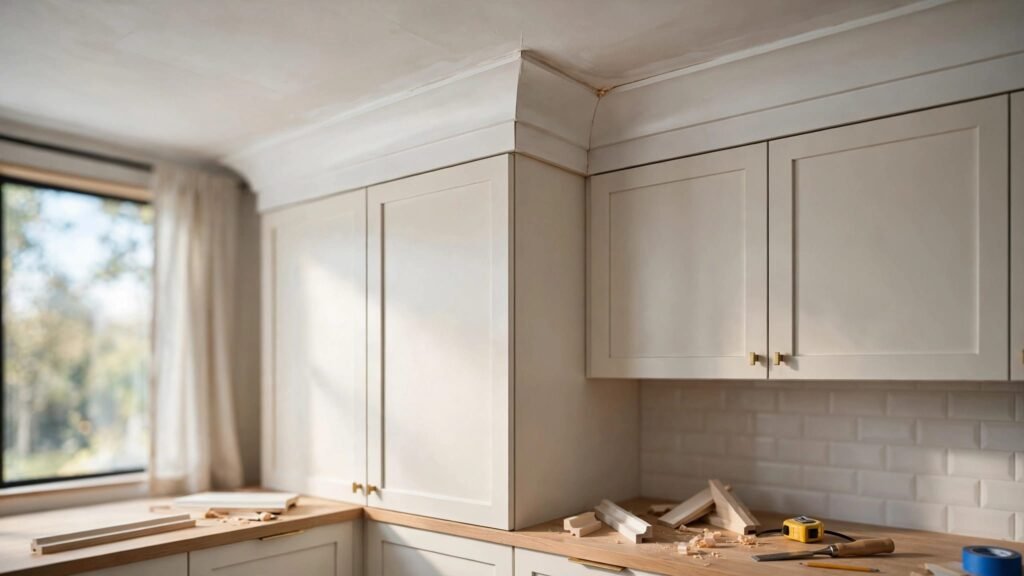
Crown molding can turn a row of upper cabinets into a finished architectural feature. When you install cabinet crown molding with accurate cuts and solid fastening, the trim closes awkward gaps and gives the cabinetry a tailored look.
The work takes patience more than special talent. Careful measuring, a few test cuts, and a plan for uneven ceilings make the difference between trim that looks fitted and trim that fights the room.
Plan the Crown Profile and Installation Method
Before buying molding, decide where it will sit and how far it should project. Crown has a spring angle, meaning it rests against two surfaces at once. Cabinet crown usually attaches near the top front of upper cabinets, not directly to the ceiling.
A profile that is too large can overpower short cabinets or crowd a soffit. Conversely, a narrow profile may disappear above tall cabinetry. Match the molding’s scale to cabinet height, ceiling height, door style, and nearby window or door casing.
Cabinet-mounted crown differs from ceiling crown
Ceiling crown bridges the wall and ceiling around the perimeter of a room. Cabinet-mounted crown creates a finished top edge on the cabinet run. It often leaves a small gap behind the molding, especially where the ceiling isn’t level.
Because the cabinet boxes provide the mounting point, don’t rely on ceiling nails to hold cabinet trim. The molding should stay fixed to the cabinetry, even when the ceiling waves slightly above it.
If your kitchen includes soffits, stacked cabinets, or tall pantry units, study the trim transition before ordering materials. This guide to crown molding for upper kitchen cabinets can help you compare proportions and placement ideas.
Gather tools before you start cutting
For most painted wood crown installations, you will need:
- Crown molding, plus 10 to 15 percent extra for mistakes and grain matching.
- A tape measure, pencil, combination square, and a level or laser level.
- A miter saw with a sharp finish blade.
- A coping saw and small file or rasp for inside corners.
- A brad nailer, 1 1/4-inch or 1 1/2-inch brad nails, and construction adhesive.
- Filler strips or solid wood mounting blocks where cabinet faces lack a nailing surface.
- Wood filler, paintable caulk, sandpaper, primer, and matching paint.
Use wood crown when you plan to stain the trim. Paint-grade poplar is a stable choice for painted cabinetry. Medium-density fiberboard can work in dry areas, but it is less forgiving around moisture and damaged edges.
Measure the Cabinet Run Before You Install Cabinet Crown Molding
Measure each straight section separately. Record the length along the cabinet face, then add extra material for angled cuts. A 45-degree miter consumes more molding than a straight butt cut.
For a run between two walls, measure at the front and back of the cabinet top. Walls often flare or narrow. Use the longer measurement when rough-cutting, then sneak up on the final fit.
Make a labeled trim sketch
Draw each cabinet wall as if you are looking down from above. Mark every inside corner, outside corner, return, tall cabinet, soffit, and exposed cabinet end.
Then label each piece in the order it will install. For example, label a long front run “A,” a short right return “B,” and a left-side return “C.” This simple map prevents reversed cuts, which are among the costliest crown molding mistakes.
Measure ceiling height in several spots, too. If you are still selecting cabinet sizes, this kitchen cabinet measurement guide helps put crown height into the larger cabinet plan.
Check for level before choosing the reveal
Hold a level across the cabinet tops and along the ceiling line. Mark the lowest ceiling point and the highest cabinet point. Those marks tell you where the crown must sit.
Set the top edge of crown molding based on the cabinet line, not the ceiling. Otherwise, a level cabinet run can look crooked because the molding follows an uneven ceiling. A narrow shadow gap at the ceiling is less noticeable than a visibly sloping trim line.
Keep the crown level with the cabinets whenever the ceiling varies. Paintable caulk can hide a small ceiling gap, but it cannot disguise a molding line that runs out of level.
Add Filler Strips for a Strong Mounting Surface
Most crown molding needs more than the thin top edge of a cabinet face frame for secure fastening. A filler strip creates a broad, solid surface behind the crown and moves the molding forward when needed.
Install the filler before you cut finish pieces. It should sit behind the crown where it will never show from normal standing height.
Choose the right filler strip placement
A 3/4-inch-thick hardwood or cabinet-grade plywood strip often works well. The strip should be wide enough for brad nails to bite into it without splitting. Attach it along the cabinet top, inside the face frame, or just behind the upper rail.
Position the strip so the lower back edge of the crown rests against it. On frameless cabinets, you may need a wider wood block because the cabinet box edge offers less nailing area.
If crown ends at an exposed cabinet side, use a return piece rather than leaving raw end grain visible. A return turns the profile back toward the cabinet, creating a finished edge.
Account for proud cabinet doors and uneven walls
Cabinet doors must open freely after the crown goes up. Before fastening filler strips, close the doors and check where their upper corners sit. The crown should remain above the door swing and should not rub against hinge hardware.
At a side wall, avoid forcing the molding tight if the wall bows. Scribe the back edge of the crown when the gap is noticeable, or use a narrow matching filler at the cabinet end. Caulk handles hairline gaps, not wide wall irregularities.
This is also where good cabinet design matters. Crown, cabinet height, filler widths, lighting, and soffits all need room to work together.
Cut Miters and Coped Joints With the Profile Facing Correctly
Crown molding is easy to cut backward because it sits at an angle. Keep every piece in the same orientation it will have on the cabinet. Most installers cut crown nested in the miter saw, with the ceiling edge against the saw fence and the wall edge on the saw table.
Mark the back of every piece with “ceiling” and “cabinet.” Those quick notes prevent a reversed cut when you return to the saw.
Use miter joints on outside corners
Outside corners occur when trim wraps around the end of a cabinet run or a projecting cabinet. Cut each mating piece at 45 degrees for a square 90-degree corner.
Dry-fit both pieces before nailing. Few kitchen corners are perfectly square, so adjust the saw a degree or two if a 45-degree cut leaves an open face. Keep the visible front edges tight, because filler won’t convincingly repair a large miter gap.
Apply a small amount of wood glue to the miter faces. Then pin the joint with brad nails after both pieces align.
Cope inside corners for a tighter fit
An inside corner forms where two cabinet runs meet in a corner. A pair of 45-degree miters can work, but coped joints hold up better when walls move slightly or aren’t square.
Start by cutting the first piece square into the corner. For the second piece, make a 45-degree miter that exposes the molding profile. Follow that profile with a coping saw, cutting slightly back from the painted face.
Test the cope against the installed first piece. File high spots until the front profile meets cleanly. The back of the joint can have a small gap because only the face needs to fit tightly.
For a long run, practice on short offcuts first. A few samples teach you how the profile sits in your saw and how much back-bevel the cope needs.
Attach Cabinet Crown Molding in a Controlled Order
Cut and dry-fit every piece in one small section before applying adhesive or firing nails. Begin with the longest, most visible front run. Then add returns and side pieces.
If the molding spans several cabinets, don’t assume every box top is flush. Place a straightedge across the run and shim the filler strip where needed. A gentle mismatch is easier to correct before the crown locks it in place.
Nail into filler strips, not thin cabinet edges
Run a thin bead of construction adhesive along the back contact area. Use adhesive sparingly, because squeeze-out can stain wood and complicate future repairs.
Hold the molding in position and drive brad nails through the lower portion into the cabinet face frame or filler strip. Add nails through the upper portion into the filler strip behind the crown. Space nails about every 12 to 16 inches, with extra support near joints and returns.
Avoid nailing through cabinet doors, finished end panels, or the cabinet box interior. If you feel uncertain about nail placement, remove a door first so you can see the face-frame structure.
Keep corners aligned while the adhesive sets
At outside miters, align the profile first, then check the long edges. A strip of painter’s tape stretched across the joint can hold light pressure while adhesive grabs.
Use a pin nailer or brad nailer to lock the miter from both directions when the material allows it. Pre-drill near delicate profile points if the molding splits easily.
After each piece, step back several feet. Cabinet crown should read as one continuous line. Small errors that disappear at arm’s length usually finish well, while a shifted corner often needs immediate correction.
Finish the Trim So It Matches the Cabinets
Finishing work separates a neat installation from a polished one. Let construction adhesive cure according to the product label before heavy sanding or painting.
First, set any proud nail heads with a nail set. Fill nail holes and small miter gaps with stainable wood filler for stained trim or paint-grade wood filler for painted crown.
Caulk only the narrow gaps
Apply a thin bead of paintable acrylic-latex caulk where molding meets the cabinet face and at small ceiling gaps. Smooth it with a damp finger or caulk tool, then wipe excess immediately.
Do not caulk stained wood unless the caulk color matches perfectly. On stained crown, tighten joints through careful cutting and use a color-matched wood filler instead.
Allow filler and caulk to dry fully. Sand lightly with 180- or 220-grit sandpaper, taking care not to round crisp profile edges.
Prime and paint in a consistent sheen
Prime raw wood, filled nail holes, and sanded areas before painting. Use the same paint sheen as the cabinet finish when possible. A satin or semi-gloss sheen is common for painted kitchen cabinetry because it cleans easily.
Brush paint into profile grooves, then smooth broad areas with a small foam roller if the product allows it. Two thin coats usually look better than one heavy coat. Reinstall any doors you removed only after the finish has dried enough to resist marks.
A Finished Crown Starts With a Straight Reference Line
To install cabinet crown molding well, use the cabinet run as your visual reference, build a secure mounting surface, and test every joint before fastening it. Coping inside corners and adjusting miters for real walls takes time, yet those details keep the trim looking intentional.
The ceiling may be uneven, but the crown line should still look straight from across the kitchen. Accurate layout and patient fitting give cabinetry the finished edge it deserves.