 Skip to content

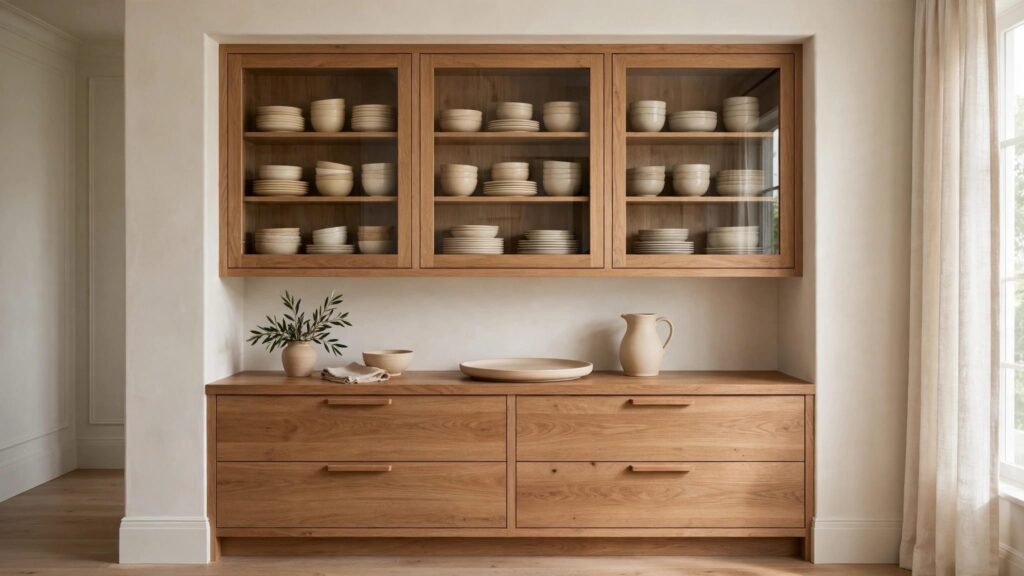
A serving platter shouldn’t require emptying a cabinet before dinner. Well-planned dining room built-ins keep dishes close to the table, protect serving pieces, and give you a place to set food.
The strongest layouts combine easy-access storage with a clear serving counter and a selective display area. That balance lets the room feel finished without requiring every shelf to stay perfectly arranged.
Start with the pieces you own, then shape the cabinets around how you serve and entertain.
Plan dining room built-ins around your collection
Before choosing doors or finishes, gather the dishware that will move into the dining room. Measure your widest platter, tallest pitcher, and deepest serving bowl. Include handles, lids, and anything that makes an item harder to fit.
This inventory prevents attractive cabinets from leaving your largest pieces homeless.
Keep everyday dishes within easy reach
Store frequently used plates and bowls where you can retrieve them without stretching or bending far. Lower drawers often work well because you can see their contents from above.
Keep glassware near the place where you pour drinks. Meanwhile, napkins and table linens belong near the table rather than behind occasional-use serving pieces.
If several household members set the table, choose locations everyone can reach comfortably. A cabinet arrangement should support the person using it most often, including anyone with limited grip or mobility.
Give occasional pieces a defined home
Holiday china, cake stands, and oversized tureens need different storage than everyday dishes. Adjustable shelves help accommodate their changing heights.
Reserve less accessible upper cabinets for lighter items you rarely use. However, keep heavy serving pieces lower, where lifting them is safer.
Avoid stacking fragile pieces simply to fill a shelf. Leave enough room to lift each item without scraping it against the cabinet above.
Choose a cabinet configuration that fits the room
The right arrangement depends on wall space, circulation, and how much serving surface you need. A full-height wall offers more storage, while a lower buffet preserves open space above it.
These configurations solve different dining-room needs.
| Configuration | Best suited to | Main planning consideration |
|---|---|---|
| Low buffet cabinets | Smaller rooms needing serving space | Balance storage depth with chair clearance |
| Base cabinets with glass uppers | Dishware storage and selective display | Keep the counter usable beneath the uppers |
| Tall cabinets at each end | Large collections with a central serving area | Check tall-door swings and counter access |
| Full-height cabinet wall | Storage-heavy households | Include a landing surface if you serve here |
Choose the arrangement that supports movement before adding decorative details.
A low buffet can sit beneath artwork or a window, provided it doesn’t interfere with the window trim or operation. In contrast, tall cabinets can frame a central counter and make the installation feel more furniture-like.
Corners deserve careful planning. Storage that extends around a corner may create awkward door interactions or a difficult-to-reach interior. Ask how you’ll retrieve the pieces stored there.
For open-plan homes, relate the dining cabinets to the kitchen through a shared door profile, wood tone, or hardware finish. The rooms can feel connected without matching every detail.
Protect chair clearance and serving access
Dining room built-ins take up floor space even when their doors are closed. Plan around the table with chairs pulled out, not tucked neatly underneath.
Use painter’s tape to mark the proposed cabinet footprint. Then walk between the taped edge and the dining chairs while someone sits at the table.
Also check what happens when a drawer opens. A comfortable walkway can become unusable once a drawer projects into it. Cabinet handles add another small projection that matters in tight rooms.
The serving counter needs enough uninterrupted space for the pieces you use together. Position it where you can set down a platter without reaching across a seated guest or blocking the kitchen doorway.
Include baseboards, outlets, vents, window trim, and wall irregularities in the measurements. These details affect fillers, end panels, and the finished fit.
A cabinet planning consultation can help connect your storage inventory with door swings and room clearances. Bring table dimensions and photos showing the surrounding walls, including features that must remain.
Balance display with concealed storage
A dining cabinet can showcase your collection without displaying everything you own. Often, a smaller glass-front section above solid lower doors provides the most manageable balance.
Choose glass according to what belongs behind it
Clear glass suits coordinated dinnerware, attractive pitchers, and glassware you enjoy arranging. However, it also reveals shelf edges, uneven stacks, and fingerprints.
Reeded glass distorts the view through its linear texture. Frosted glass obscures contents more evenly, while seeded glass adds small bubbles or variations within the pane. Seeded glass can remain quite transparent, so examine a sample rather than assuming it hides clutter.
Look at each glass option with dishes behind it. Its appearance on an empty showroom door won’t tell you enough about everyday use.
Conceal the items that create visual clutter
Solid doors are useful for mismatched bowls, food-storage containers, extra linens, and serving accessories. They also let you organize by function without considering how each shelf looks.
Open shelves offer immediate access, but dishes collect dust without a door protecting them. Reserve them for frequently used items or a small decorative grouping.
Behind clear glass, specify finished interiors and consider the appearance of shelf supports. Those details remain visible even when the cabinet doors are closed.
Fit the interiors to plates, platters, and linens
Interior fittings should solve a storage problem you already have. Buying every organizer can reduce usable space and add expense without improving access.
Use drawers for dishes and smaller serving supplies
Full-extension drawers let you reach items at the back. They’re useful for plates, folded linens, napkin rings, and serving utensils.
Dish drawers need suitable construction and slides for the stored weight. Ask for the manufacturer’s load rating rather than assuming soft-close hardware indicates strength. Soft-close controls how a drawer shuts; it doesn’t establish its capacity.
Adjustable pegs or fitted dividers can keep plate stacks from shifting. Check that the organizer accommodates your actual dishes and leaves enough space to grasp them.
Keep linens separate from anything that could scratch them or transfer residue.
Store wide pieces upright when practical
Vertical dividers make trays and many platters easier to retrieve because you don’t have to lift an entire stack. Measure the largest piece in the orientation you’ll store it.
Check both the cabinet opening and the interior depth. A platter may fit inside yet remain difficult to pass through the doorway.
Adjustable shelves work well for bowls and pitchers. However, wide shelves holding heavy dishware need appropriate support.
Avoid designing solely around shelf count. Fewer properly spaced shelves may hold your collection better than many closely spaced ones.
Choose materials for daily use and Florida conditions
Cabinet appearance matters, but construction, edge protection, and cleaning requirements affect how the installation ages. In Southwest Florida, also consider humidity, strong daylight, and proximity to exterior doors.
Compare interior surfaces as well as door finishes
White melamine interiors offer a bright, smooth background that makes stored items easier to see. Woodgrain interiors add warmth, especially behind glass or within open niches.
However, “woodgrain” describes an appearance rather than one material. Ask whether the surface is laminate, textured melamine, or real wood veneer.
Inspect exposed edges and seams, particularly around a beverage area. A durable surface can’t compensate for weak shelf support or poorly protected panel edges.
For the serving counter, compare care requirements as carefully as appearance. Ask how the chosen surface handles wine, citrus, and hot serving dishes.
Test exterior finishes in your dining room
Painted doors offer broad color choices, while stained wood introduces natural grain variation. Satin or matte surfaces reduce reflected glare; glossy finishes reveal reflections and fingerprints more readily.
View samples in daylight and under your evening lighting. A pale finish can look different beside warm flooring, and wood tones may change appearance near bright windows.
Ask for written cleaning instructions and touch-up information. Don’t assume similar-looking finishes require the same care.
A conditioned indoor dining room has different exposure than cabinetry beside frequently open lanai doors. Discuss the actual location rather than treating any finish as climate-proof.
Light the display and the serving counter separately
Display lighting and counter lighting perform different jobs. Interior fixtures highlight dishes, while under-cabinet lighting helps you see the serving surface.
Inside glass cabinets, fixture placement should illuminate the contents without shining into seated guests’ eyes. Concealed LED strips or suitably placed puck lights can work, depending on the cabinet construction.
Solid shelves block light passing downward, so one fixture at the top may leave lower shelves dim.
Review the lighting plan before ordering cabinetry. Wiring paths, shelf placement, and space for drivers or transformers may need accommodation. Keep serviceable components accessible.
For the counter, place lighting where it reaches the work surface rather than the front edge alone. A concealed channel can reduce glare and keep the fixture out of view.
Warm-white lighting often suits dining spaces. However, compare it with nearby fixtures so the cabinet wall doesn’t look disconnected from the room. Dimming is helpful when you want bright serving light during dinner preparation and softer illumination afterward.
Have a qualified electrician review electrical work and applicable requirements.
Review hardware, drawings, and the complete quote
Handles should feel comfortable when you open a loaded drawer. Test a representative sample with your hand around it, checking grip space and sharp edges.
A little contrast helps hardware remain easy to locate. Brushed nickel, stainless steel, matte black, and warm brass tones create different effects, but the finish name alone doesn’t describe durability. Ask about the base metal, coating, and care requirements.
Before approving the cabinet design, review elevations alongside the floor plan. Confirm fillers, door swings, drawer clearances, shelf supports, and lighting locations.
Also request an itemized quote covering cabinetry, countertops, hardware, delivery, installation, electrical work, and any wall repairs. Establish which items each contractor supplies.
TEC Cabinetry Plus offers consultations by appointment in Fort Myers, along with comprehensive quotes and 3-D interactive designs. You can request a free cabinetry consultation to discuss your collection, room measurements, and serving needs before selecting the final configuration.
Make room for the pieces you use
Successful dining room built-ins give each dish a usable home while keeping the table and serving area comfortable. Start with your collection, then choose storage that makes retrieval easy.
A restrained display, accessible interiors, and well-placed lighting can make the cabinet wall feel polished without adding daily upkeep. The finished arrangement should let you reach that serving platter without rearranging everything around it.
