
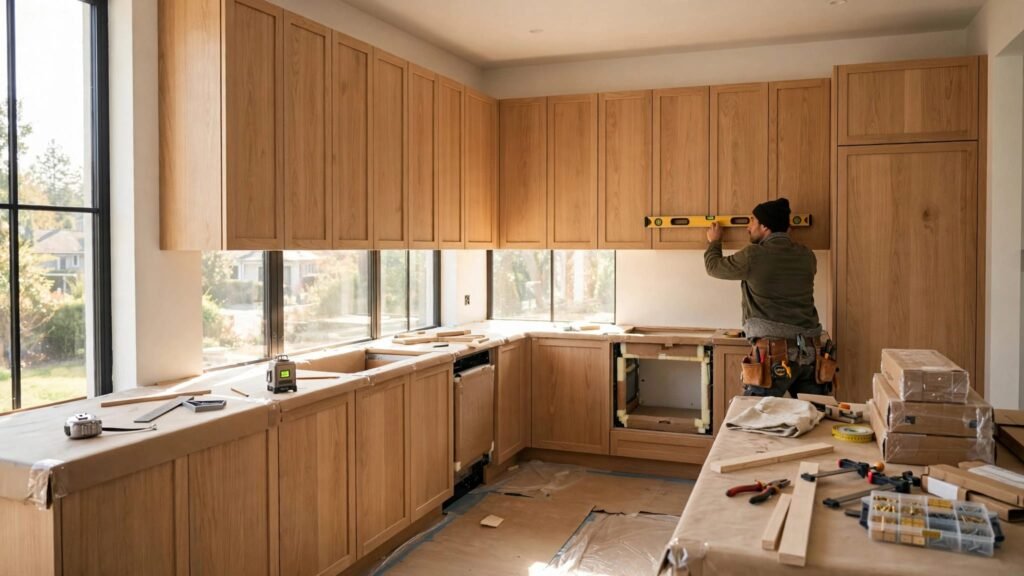
A cabinet run can look finished in a day, yet its accuracy affects every trade that follows. The right cabinet installation order keeps appliance openings, countertop seams, and door gaps where they belong.
Most kitchens include base cabinets, wall cabinets, and tall pantry or oven units. Their sequence isn’t identical in every home, but the work must follow an approved layout and site conditions. Start with a room that is ready to support accurate installation.
Cabinet Installation Order: Start With the Room
Before any cabinet box is lifted, the installer should confirm the final plans against the actual room. A final measure matters because walls and floors rarely match drawings perfectly.
Cabinets should also acclimate indoors for 48 to 72 hours before installation. Keep boxes dry, protected from direct sun, and off bare concrete while they wait.
Confirm finished-floor height and layout lines
The finished-floor reference controls base cabinet height, toe-kick alignment, dishwasher clearance, and countertop support. Base cabinets are commonly 34 1/2 inches high before the countertop, so even modest floor variations can affect the finished work surface.
Installers mark level reference lines and cabinet locations before fastening anything. They also verify filler widths, panel locations, and the fronts of adjacent boxes. This early work makes the cabinet installation order more predictable.
Locate framing and utility routes
Wall cabinets and tall units need secure fastening into verified wall studs, blocking, or an appropriate masonry system. Adjacent cabinets should not carry the full load of a poorly anchored box.
Before drilling, confirm plumbing, electrical, ductwork, and protective plates. Turn off power or water when the work area requires it. Removing doors and drawers, when the manufacturer permits it, also reduces lifting weight and protects finished edges.
For a fuller room-readiness review, use this cabinet installation preparation guide before delivery day.
Typical Order for Base, Wall, and Tall Cabinets
A planned sequence keeps every cabinet face aligned, but the installer may change the order to suit access, wall conditions, or the layout. In many kitchens, base runs establish the main reference, while wall cabinets and tall units follow the elevations and fastening plan.
Step 1: Set and level the base cabinets
Installers often begin with the main base run because it establishes the countertop footprint. Place the first cabinet at the highest practical point of the floor, then check it side to side and front to back with a level.
Low areas need solid shims near cabinet sides, partitions, or corners. Never twist boxes to follow an uneven floor. As each cabinet joins the run, clamp adjoining faces, verify the front line, and fasten according to the cabinet manufacturer’s requirements.
Base cabinets are typically 24 inches deep. Their final placement affects sink location, range spacing, dishwasher fit, and countertop overhang. Review the kitchen cabinet measurement guide before locking in those clearances.
Step 2: Install wall cabinets with safe support
Some crews install wall cabinets before base cabinets because open floor space makes overhead work easier. Others set uppers after the base run is level. Both approaches can work when reference lines, appliance openings, and wall anchors are confirmed first.
Wall cabinets commonly sit 18 inches above a finished countertop. A temporary ledger can hold the boxes at the correct height while the installer checks plumb, clamps neighboring cabinets, and secures each unit to framing. Common wall cabinet heights are 30, 36, and 42 inches.
A wall cabinet can look straight while still being unsafe if its fasteners miss solid framing or approved backing.
Step 3: Position tall cabinets to match the elevation
Tall pantry cabinets and oven towers need extra coordination because they connect the floor, wall, ceiling line, and nearby appliances. Common heights are 84, 90, or 96 inches, and many are 24 inches deep to align with base cabinetry.
The installer may set a tall unit early or later in the process, depending on access and the approved plan. What matters is that it sits level and plumb, has the support required by its manufacturer, and aligns with nearby upper cabinets, refrigerator panels, and fillers.
Why the Sequence Matters Before Countertops
Cabinets must reach their final position before countertop templating. The template follows the actual cabinet run, not the drawing alone.
Stable base cabinets protect the template
A small change in a base cabinet can shift countertop seams, sink cutouts, cooktop placement, and side returns. Therefore, installers should inspect cabinet tops with a long level after every box, panel, and support is secured.
Countertop fabricators need a stable surface for precise measurements. Cabinet changes after templating can create costly fit problems.
Countertops come before backsplashes
Once the cabinets are secure, approve countertop seams, edges, sink details, and cutouts. After fabrication and countertop installation, the backsplash can begin from the finished counter edge.
This order also allows the crew to inspect wall joints and appliance clearances before tile, stone, or another backsplash material covers the area. A thoughtful cabinet design gives installers room for fillers and scribe panels where walls are out of square.
When the Installation Sequence Needs Adjustment
The usual cabinet installation order changes when the room presents a condition that affects safety or alignment. Address those issues before trying to hide them with trim.
Uneven floors, damaged walls, and masonry
Shims can correct small floor dips, but they cannot solve active moisture damage, a weak wall, or major structural movement. Stop work if cabinets need excessive shimming to sit level, then repair the underlying condition.
Concrete block walls require suitable anchors and careful drilling. Base cabinets still need support from the floor, while wall fasteners keep the run from shifting or tipping.
Appliance changes and special cabinetry
A revised refrigerator, range hood, built-in oven, or dishwasher model can change cabinet openings. Confirm model numbers and manufacturer requirements before the boxes are fixed in place.
Open shelves, floating vanities, and full-height pantry units also need their own support plan. For layout choices that account for fillers, work aisles, and appliance placement, consult the kitchen cabinet layout planning guide.
Key Takeaways
- Confirm the finished-floor height, cabinet schedule, appliance openings, and utility locations before installation begins.
- Set every cabinet level, plumb, and aligned before attaching neighboring boxes, panels, and trim.
- Treat tall cabinets as part of the whole elevation, not isolated storage pieces.
- Schedule countertop templating only after cabinets, fillers, supports, and end panels are final.
- Expect the sequence to change when walls, floors, access, or appliance requirements demand it.
Frequently Asked Questions
Should wall cabinets go in before base cabinets?
Wall cabinets often go in first because installers have clearer access to the wall. However, many projects set and level base cabinets first to establish the countertop line. The approved layout and safe working conditions should determine the order.
Do tall cabinets have to be installed first?
No single sequence fits every kitchen. Tall cabinets must align with the base run, upper cabinets, ceiling, fillers, and appliance openings. The installer should place them when those relationships can be measured and secured accurately.
Can countertops be templated before cabinet installation?
No. The fabricator needs the final cabinet footprint, including finished panels and supports, to measure countertop depth, seams, overhangs, and cutouts accurately.
A Finished Cabinet Run Starts With Alignment
The best cabinet installation order is the one that produces level bases, safely anchored wall units, and tall cabinets that align with the room’s full elevation. Careful preparation prevents small errors from becoming visible problems after countertops and backsplashes arrive.
When the cabinet boxes are secure and final details are settled, every later step has a dependable surface to follow.