 Skip to content

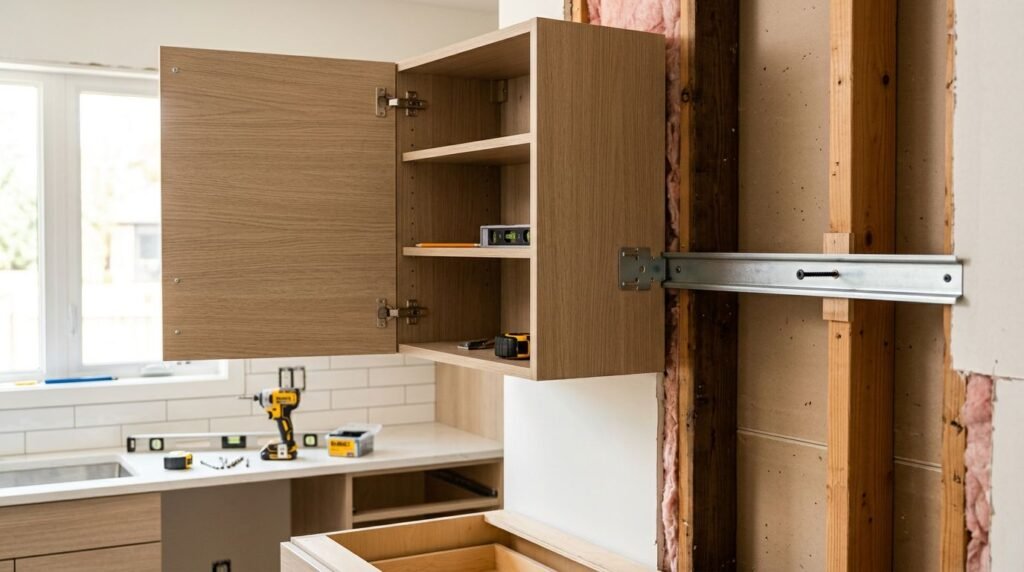
A cabinet can look perfectly straight while its mounting screws miss the framing behind it. To fasten kitchen cabinets to studs securely, you need verified support, suitable fasteners, and cabinet boxes that stay square as you tighten them.
That matters when your new upper cabinets will hold dishes or a tall pantry needs protection against tipping. Start with the approved cabinet layout, then confirm exactly where each cabinet can attach.
Key Takeaways
- Confirm wood framing at the actual mounting locations, and check for utilities before drilling.
- Follow the cabinet manufacturer’s fastening requirements and use the designated mounting rails or reinforced areas.
- Support wall cabinets during installation, and place shims behind mounting points wherever the wall leaves a gap.
- Keep the entire cabinet run level, plumb, and aligned before adding doors, stored items, or countertops.
Plan the Cabinet Run Before Making Holes
Good cabinet design includes the connections hidden behind the finished doors. Review the installation instructions alongside the approved layout before delivery or demolition makes changes difficult.
Identify the Cabinet’s Structural Mounting Areas
Find the mounting rails, reinforced back sections, brackets, or hanging system identified by the manufacturer. Those parts transfer the cabinet load into the wall structure.
Thin back panels, shelves, and decorative trim aren’t substitutes for designated attachment points. Also check where mounting hardware could interfere with hinges, drawer slides, or interior accessories.
If the cabinet uses a separate hanging rail, follow that system’s instructions rather than adapting a direct-through-the-box method. Different cabinet constructions need different attachment details.
Establish One Reference for the Whole Run
Mark cabinet positions, fillers, end panels, and appliance openings. Then establish level reference lines with a laser or long spirit level.
Don’t use an uneven ceiling or an existing countertop as your reference. Instead, position the cabinets according to the approved elevation and check clearances against the actual appliances.
The kitchen cabinet layout planning guide helps coordinate storage, work areas, and openings before cabinet positions become permanent. Confirm these details before selecting wall attachment locations.
Verify Wood Studs and Check What’s Behind the Wall
A stud-finder reading is a starting point. Before fastening, confirm that the planned connection reaches suitable wood framing rather than a pipe, metal member, or isolated patch of backing.
Mark Stud Centers at the Mounting Heights
Scan the wall to identify both edges of each suspected stud, then mark its centerline. Repeat the check at the heights where the cabinet’s mounting areas will sit.
A magnet can help identify patterns of existing wall fasteners, but one magnetic spot doesn’t prove a safe mounting location. Compare readings along the proposed vertical line.
Don’t assume framing continues unchanged near windows, doors, soffits, or remodeled sections. Use the guide to verify stud locations before mounting cabinets when the wall gives inconsistent clues. If you cannot confirm the framing, have the installer inspect it before proceeding.
Check Utilities and Unexpected Wall Conditions
Review plumbing, electrical wiring, and ductwork near every proposed fastening point. A stud finder doesn’t establish that a drilling path is clear.
Stop if you encounter a protective metal plate or unexplained resistance. Don’t drill through the obstruction to reach deeper material. Shut off affected services when the work requires it, and involve the appropriate trade when utility locations remain uncertain.
If the framing turns out to be steel, use a separate plan for mounting cabinets to metal framing. Wood-framing assumptions don’t apply to that connection.
Select Fasteners and Prepare Stable Support
The cabinet instructions and actual wall assembly determine the hardware. Buying a longer screw without checking those details can create a different problem behind the wall.
Match Hardware to the Complete Connection
Confirm the manufacturer’s required fastener type, length, quantity, placement, and pilot-hole requirements. Account for the cabinet’s mounting area, wall covering, any shims, and the framing connection.
If the instructions don’t resolve your wall condition, ask the cabinet supplier or installer for an approved attachment detail. Don’t substitute a general-purpose wall anchor for missing structural support.
For Fort Myers kitchens and bathrooms, hardware suited to moisture exposure is worth discussing. Corrosion resistance matters, but it doesn’t replace the correct connection for the cabinet, wall, and expected contents. Sink areas deserve particular attention during that review.
Prepare Tools and a Safe Lifting Arrangement
Have a level, straightedge, tape measure, stud finder, suitable shims, padded clamps, drill, driver, and required bits ready. Protect finished surfaces before moving the boxes into position.
When the manufacturer permits it, remove doors and drawers to reduce lifting weight. Label them and keep them on padded supports.
For upper cabinets, a level temporary ledger can support the boxes during positioning. Attach it only to verified structural support, and confirm that the installation method permits it. Arrange a helper or cabinet lift before lifting, because an unsecured upper cabinet shouldn’t depend on one person’s grip.
How to Fasten Kitchen Cabinets to Studs
Follow the cabinet manufacturer’s sequence if it differs from the steps below. Keep temporary support in place until the required attachments are complete and the installation is stable.
- Position the first cabinet. Set it at the planned reference point, often a corner or another defined starting location. Check height, level in both directions, and the front edge for plumb. Confirm that the mounting areas align with verified support.
- Shim the wall gaps. Place suitable shims between the wall and the mounting rail or reinforced area at the fastening points. Fill the gap without pushing the cabinet face forward. Recheck that the box remains square.
- Prepare the required holes. Drill pilot holes where the cabinet and fastener instructions require them. Use the prescribed drilling detail, and keep the path clear of utilities. Don’t add improvised holes through thin cabinet panels.
- Install the specified fasteners. Tighten gradually while watching the cabinet face and mounting area. Stop if the box twists, the wall surface crushes, or a gap closes unevenly. Correct the support before continuing.
- Align and connect neighboring boxes. Position the next cabinet against the same reference lines. Provide its required wall attachment, align the faces, and use padded clamps before joining the cabinets as instructed. The neighboring cabinet shouldn’t carry an inadequately anchored box.
If tightening a mounting screw changes the cabinet’s shape, correct the support behind the mounting area instead of adding more force.
Remove the ledger only after the cabinets are fully secured and checked. Repair its attachment holes as appropriate for the wall finish.
Secure Base Cabinets and Tall Units Without Twisting Them
Upper cabinets depend on their wall connections for support. Perimeter base cabinets generally rest on the floor, while their wall attachments restrain movement.
Level base cabinets with suitable support beneath low points. Then shim wall gaps at the designated mounting areas before fastening. Pulling the cabinet backward against an uneven wall can distort the box even when its top initially reads level.
Base cabinets are commonly 34 1/2 inches high before the countertop, so floor variation affects the finished work surface. Establish the planned elevation across the full run rather than following each dip in the floor.
Tall pantry cabinets need coordinated floor support, wall restraint, and alignment with neighboring units. Check the manufacturer’s attachment instructions before treating a tall cabinet like a standard base box.
If the planned attachment points miss framing, arrange properly connected blocking or another approved support detail. Loose wood placed behind drywall isn’t structural backing. During an open-wall remodel, photograph installed backing before the wall closes.
Inspect the Entire Run Before Adding Weight
Once the mounting connections are complete, check the cabinets together. A box can be level across its top while its front edge leans or its neighboring faces sit out of line.
Use a long level across the tops and a straightedge across adjoining faces. Inspect cabinet corners, mounting points, and joints for movement or distortion. Then reinstall doors and drawers according to the manufacturer’s instructions.
Open each door and drawer gently. Look for rubbing, uneven gaps, and interference with appliances, walls, or trim. Correct mounting and alignment problems before using hinge adjustments to disguise them.
A secured cabinet shouldn’t rock or pull away from the wall during a gentle stability check. If it moves, stop and have the connection corrected before loading it.
Use the cabinet installation checklist to review the finished run, including anchoring, clearances, and countertop readiness. Schedule countertop templating only after the base cabinets, fillers, end panels, and required supports are final.
Frequently Asked Questions
Can I Mount a Cabinet Where No Stud Lines Up?
Only with a support system approved for the cabinet and wall conditions. That may require opening the wall and installing properly connected blocking. Don’t assume drywall anchors or connections to neighboring cabinets can replace the required wall support. Resolve the attachment detail before hanging the cabinet.
Should I Tighten Screws Until Every Wall Gap Disappears?
Keep the cabinet square and support the mounting points with suitable shims. An uneven wall may leave a gap that trim later conceals. Extra screw pressure can bend the cabinet instead of correcting the wall. Finish molding can cover a narrow gap, but it cannot repair distorted installation.
When Should I Hire a Professional Installer?
Get professional help when framing is uncertain, utilities cross mounting locations, or the wall shows damage or moisture staining. Heavy upper cabinets, unusual hanging systems, and missing backing also warrant an installer. For homeowners buying new cabinets, settling these conditions before delivery helps avoid last-minute changes to the finished room.
Secure Connections Keep the Finished Kitchen Aligned
A straight cabinet face starts with solid support behind it. Verified framing, approved fasteners, and carefully placed shims let the cabinet remain square while the wall connection holds it securely.
Check alignment as each box goes up, then inspect the complete run before adding weight. Those hidden connections protect the doors, drawers, and clean lines you chose for your new kitchen.
