
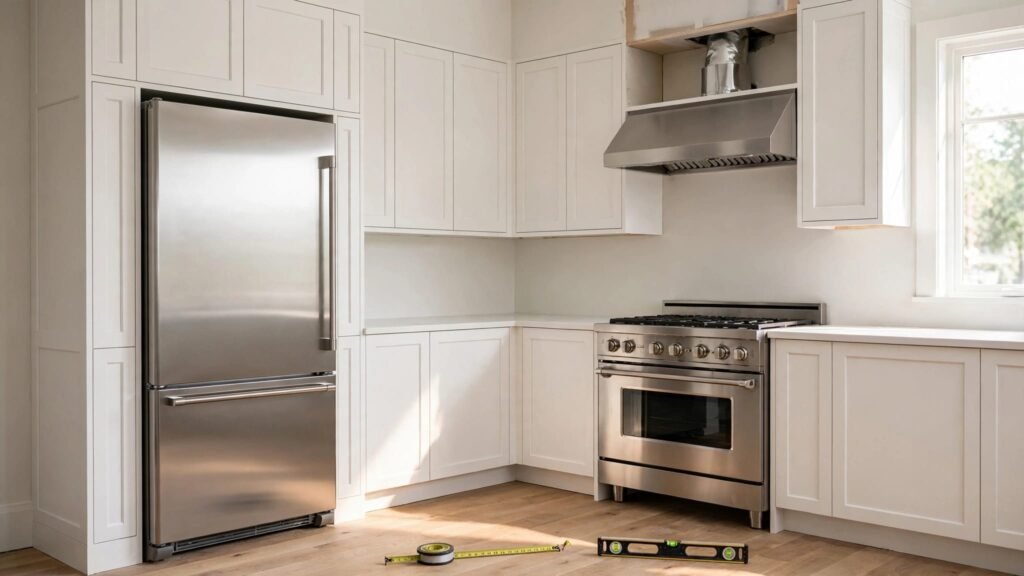
A freestanding refrigerator or range can look intentional when the surrounding cabinetry frames it with clean, well-fitted panels. The work is less about hiding an appliance and more about creating a finished opening that respects how that appliance operates.
Before you install cabinet panels, confirm the appliance model, its installation manual, and every connection behind or beside it. A handsome panel is never worth restricted airflow, a pinched water line, or an appliance you can’t pull out for service.
Careful measuring and a secure mounting plan turn this project into a durable part of your kitchen rather than a cosmetic patch.
Know What Cabinet Panels Can and Cannot Do
Cabinet panels around freestanding appliances are usually finished end panels, refrigerator side panels, fillers, or tall cabinet gables. They bridge visual gaps, align the appliance with nearby cabinetry, and create a built-in appearance without attaching wood directly to the appliance.
Keep the appliance truly freestanding
The panel system must stand on its own. Fasten panels to cabinets, wall studs, floor blocking, or a purpose-built support frame. Never screw through an appliance cabinet, back, or side to hold a panel in place.
A range, refrigerator, dishwasher, or laundry unit needs room to move when repairs are needed. It also expands and vibrates during normal use. A panel that presses against it can cause rattles, worn finishes, or damaged components.
Cabinet panels should frame the appliance opening, not trap the appliance inside it.
Start with the manufacturer’s requirements
Every appliance model has its own needs for clearance, ventilation, electrical access, gas piping, water supply, drain connections, and door swing. Read the installation guide before ordering panels or cutting material.
Refrigerators often need air circulation around designated areas. Ranges may require clearance from combustible materials and access to a gas shutoff valve. Dishwashers need a route for hoses and wiring. Follow the manual for exact requirements, even if an older appliance fit differently.
Gather Tools and Materials Before Cutting
Good preparation prevents a small fitting issue from becoming an expensive replacement panel. If you are ordering new cabinetry, include appliance panels in the original plan so the door style, finish, edge treatment, and grain direction match.
For broader planning, use a kitchen cabinet measurement guide to organize room dimensions, appliance specifications, and door-swing notes before finalizing your order.
You will typically need:
- A tape measure, straightedge, pencil, and combination square for marking accurate cut lines.
- A long level or laser level to identify floor and wall variations.
- A stud finder, drill-driver, drill bits, countersink bit, and appropriate screws.
- Shims, wood blocking, and construction adhesive rated for cabinet installation where needed.
- Cabinet panels, fillers, scribe molding, edge banding, and touch-up materials that match the cabinetry.
- A circular saw or track saw with a fine-finish blade, plus a jigsaw for controlled cutouts.
- Safety glasses, hearing protection, gloves, and a dust mask when cutting engineered wood products.
Use cabinet-grade fasteners that match the material and mounting surface. Drywall anchors alone rarely provide enough holding strength for a tall, full-depth panel.
Measure the Appliance Opening at Several Points
Walls and floors are often out of square, especially in remodels and older homes. A single width measurement can hide a taper that makes a panel bind at the front or leave a visible gap at the back.
Record width, depth, and height separately
Measure the appliance opening at the front, midpoint, and back. Then measure height at both sides and across the opening. Record the smallest usable dimension, because that is the point that controls fit.
Next, measure appliance depth from the finished wall to the front of the doors or handles. Include baseboard thickness, outlet covers, water boxes, gas connections, and any existing trim. A panel that looks correct in a floor plan may project past the appliance or interfere with a door.
Mark the centerline of the appliance and nearby cabinet faces. This helps keep side panels visually balanced, particularly around a refrigerator or range.
Account for door swing and moving parts
Open every appliance door fully before deciding where panels will sit. Refrigerator handles, oven doors, warming drawers, and nearby cabinet drawers all need their own paths.
Also check removable parts. Refrigerator crisper drawers, water filters, range grates, and dishwasher racks may need more clearance than the closed appliance suggests. Planning an efficient kitchen cabinet layout early helps prevent these small conflicts from becoming daily annoyances.
For a refrigerator surround, review refrigerator cabinet ventilation and measurements alongside your appliance manual. The cabinet opening must follow the actual model’s published requirements.
Correct Uneven Walls and Floors First
Panels can only look square when their reference points are sound. Do not force a tall panel tight against a bowed wall or use the appliance as a spacer. Both approaches create stress and make future removal difficult.
Find the high points
Place a long level on the floor where each panel will stand. Identify high spots, dips, and changes in slope. A high point determines where the panel begins, while low areas may need shims or a carefully fitted base support.
Check walls with the same method. If a wall bows outward, the panel may need to be scribed so its rear edge follows the wall while its front edge stays plumb. Scribe molding can cover a small irregular gap, but it cannot correct a severely uneven surface.
Build a stable mounting surface
Attach wood blocking to studs when a panel needs support away from an adjacent cabinet. Keep blocking clear of electrical boxes, plumbing, ductwork, and appliance ventilation paths.
Set tall panels plumb, then secure them to solid framing or cabinet sides. Shims belong behind the panel at fastening points, not loosely under an unsupported edge. Trim shim ends flush before adding finished molding.
In humid areas, seal any field-cut edge. Moisture can swell exposed particleboard or MDF, especially near refrigerators with ice makers and water lines.
How to Install Cabinet Panels Without Damaging Appliances
Move the appliance out of the opening when possible. Unplug it first, shut off water or gas where applicable, and follow the manufacturer instructions for disconnection. If moving a heavy unit is beyond your comfort level, hire a qualified appliance technician.
1. Make a dry fit before fastening
Place each panel in position without screws. Use spacers or temporary shims to hold the manufacturer-required clearance around the appliance area. Confirm that the panel sits plumb and that its front edge aligns with nearby cabinet faces.
Check the appliance opening again before making cuts. If a panel needs trimming, cut from the back when using a circular saw to reduce chipping on the finished face. Use painter’s tape along the cut line for added protection.
2. Attach panels to cabinetry or framing
Where a panel meets a cabinet, clamp it flush and predrill pilot holes from inside the cabinet box. Use screws short enough that they won’t break through the finished panel face. Countersink carefully, then cover exposed screw heads with matching caps if needed.
For a panel against a wall, fasten through predrilled locations into studs or properly installed blocking. Keep screws away from likely utility routes. Never assume a wall cavity is empty because a stud finder shows no stud.
If a panel sits beside a refrigerator, do not attach it to the refrigerator or let it rest on a water line. Maintain the gap and ventilation space required by that model’s manual.
3. Add fillers and scribe pieces last
Fillers close narrow gaps between a panel and cabinet. They also give doors and drawers room to open where a panel meets a wall. Cut and test-fit them slowly because a small adjustment can change the reveal across the whole run.
Scribe molding works best at walls. Hold it against the wall, trace the wall contour onto the molding, and trim to the line. Fasten the finished piece to the cabinet or panel, not to the appliance.
Preserve Access to Utilities and Future Service
A polished cabinet design still needs practical service access. Before permanently closing a side or back area, locate every outlet, shutoff valve, drain hose, gas valve, junction box, and water connection.
Plan removable sections where needed
Use screws rather than permanent adhesive for panels that cover plumbing or appliance connections. A removable panel may save hours of labor when a technician needs to replace a valve, hose, or outlet.
Leave accessible paths for refrigerator water lines and dishwasher drain hoses. Avoid sharp bends and don’t compress hoses behind a panel. For gas appliances, keep the shutoff valve reachable and follow local code requirements.
If the installation involves new gas piping, electrical circuits, or plumbing changes, use licensed professionals. Appliance panels are finish carpentry, but utility modifications require different skills and permits.
Test operation before adding final trim
Slide the appliance into place only after checking the opening one last time. Restore utilities according to the appliance manual, then test the unit before installing toe kicks, scribe trim, or decorative molding.
Open doors fully, pull out drawers, and listen for vibration. Check that refrigerator doors clear adjacent panels and that appliance cords, hoses, and lines aren’t pinched. A panel that needs adjustment is far easier to correct before the final trim goes on.
For larger kitchen updates, preparing for cabinet installation helps coordinate appliance locations, finished surfaces, and utility checks before installation day.
Finish the Surround for a Built-In Look
Small alignment details determine whether panels look original to the kitchen. Match the panel’s front reveal to nearby cabinet doors and drawer fronts. If the cabinetry has a visible grain, keep the grain direction consistent across panels and fillers.
Use matching edge banding or factory-finished edges at exposed cuts. Then apply touch-up material sparingly to minor nicks or fastener locations. Excess touch-up can leave a dull or raised patch.
Do not seal panels so tightly that ventilation openings disappear. Decorative trim should respect the appliance manual, even when a continuous cabinet line looks tempting. Function belongs in every finished kitchen.
Conclusion
When you install cabinet panels around freestanding appliances, accurate measurements and service access matter as much as finish matching. Build the panels into the cabinetry or wall framing, then give the appliance the clearances its manufacturer requires.
A well-planned surround makes the kitchen feel composed while keeping repairs, airflow, and daily use uncomplicated for years to come.
FAQ and Troubleshooting
Can cabinet panels touch a freestanding refrigerator?
They should not touch unless the refrigerator manufacturer expressly allows it. Use the appliance manual to confirm side, top, rear, and front clearance needs. The panel should attach to adjacent cabinets or framing, with space left for airflow and appliance removal.
What if the floor slopes under a tall panel?
Find the floor’s highest point first. Set the panel from that reference, shim where needed, and keep it plumb. Avoid cutting the panel to follow a sloped floor unless the cabinet system and toe-kick design call for that adjustment.
Why won’t the appliance slide back after panels are installed?
A hose, cord, gas line, or panel edge may be blocking it. Pull the appliance forward safely, inspect the full route, and confirm the opening still meets the manufacturer’s depth requirement. Never force the appliance into place.
Can I glue appliance surround panels to the wall?
Construction adhesive can supplement screws on a stable wall, but it makes future removal difficult. Use screws into studs or blocking when the panel may need to come off for plumbing, electrical work, or appliance service.