
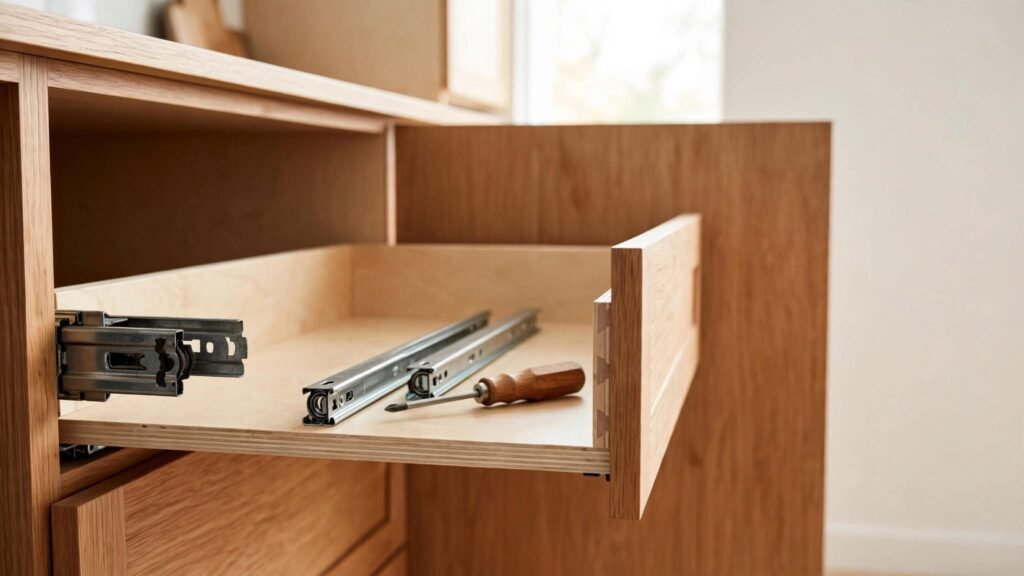
A drawer that sticks or sags may need new slides, not a new drawer box. You can often replace cabinet drawer slides and keep the existing box if the replacement matches its slide type, dimensions, and load needs.
The key is to treat the drawer, slides, and cabinet opening as one system. Identify the hardware first, measure the parts that affect fit, then install the new slides with both sides aligned.
Key Takeaways
- Match the replacement to the existing slide type whenever possible. Side-mount and undermount systems have different drawer-box requirements.
- Measure the usable cabinet depth, drawer width, and existing slide length. Product-specific clearance requirements matter.
- Remove the old hardware carefully, then use its position as a reference for the new slides.
- Keep cabinet-side slides parallel and level, and test the drawer before fully tightening the screws.
- A drawer carrying heavy cookware needs slides with an appropriate load rating.
Identify the Existing Drawer Slide Type
Start by pulling the drawer out far enough to inspect the hardware. If it has a release lever or tab, operate it as you extend the drawer. Support the box as it comes free, since some drawers are heavier than they look.
Side-mount or undermount?
Side-mount slides attach to the outside faces of the drawer and the inside walls of the cabinet. They remain visible when the drawer is open. Roller slides and ball-bearing slides can both use side-mount hardware, so note how the slide moves as well as where it sits.
Undermount slides attach beneath the drawer. Their hardware is mostly hidden, and the drawer may have clips or other fittings underneath. Some undermount systems also require specific drawer dimensions or notches. Replacing them with a different style may mean altering the box, which works against the goal of reusing it.
For a closer comparison of the two common arrangements, see our guide to undermount vs. side-mount drawer slides.
Record the hardware details
Look for a manufacturer name, model number, length marking, or load information stamped on the slide. Photographing or writing down those details can help you find a close replacement.
Also note whether the drawer has full-extension or partial-extension travel, and whether it closes softly. These features affect access and feel, but a matching label alone doesn’t guarantee fit. The slide still needs to suit the cabinet and drawer dimensions.
Check Whether the Drawer Box Can Stay
A sound drawer box can usually remain in place when the problem comes from worn, bent, or damaged slides. Check the box before ordering hardware. Look for cracked sides, loose joints, a sagging bottom, and screw holes that no longer hold fasteners.
Match the slide to the existing construction
Side-mount slides work with many standard drawer boxes, including plywood, solid wood, and some dovetail constructions. The replacement still has to fit the drawer’s width and the cabinet opening. A box built for side-mount hardware may not meet the measurements or mounting requirements of an undermount system.
The reverse is true as well. An undermount slide often needs specific bottom clearance, clips, or rear fittings. Avoid changing slide styles simply because the new hardware looks similar. The differences between cabinet drawer slide types affect both fit and usable drawer width.
Consider the drawer’s load
Think about what the drawer holds when it’s full. A drawer used for utensils has different demands from one loaded with pans or cast-iron cookware. Count the box and drawer front along with the contents when comparing load ratings.
A damaged box may still be repairable, but loose joints or a weak bottom can undermine new slides. If the box stays square and its attachment points are sound, replacing the slides alone may be practical.
Measure for Compatible Replacement Slides
Measure the actual cabinet and drawer rather than relying on a nominal cabinet size. Cabinets can vary, and face frames or other internal components can limit the usable space.
Measure the cabinet and drawer
Record the inside cabinet depth from the front mounting area to the back panel. Measure the drawer’s outside width, height, and depth. Also note any obstruction near the front or rear, such as a face frame, shelf, or cabinet component.
For side-mount slides, the space beside the drawer matters because the hardware occupies room on both sides. The required clearance varies by product, so use the specifications for the replacement model rather than assuming a measurement from another slide will apply.
A useful starting point for side-mount sizing is the cabinet depth minus 1/16 inch. Compare that result with the available slide lengths and the manufacturer’s fit requirements.
Match length, clearance, and capacity
The slide must fit within the cabinet’s usable depth without striking the back panel. Check the required side, bottom, front, and rear clearances for the specific model. Also confirm whether the cabinet style needs a bracket, rear socket, spacer, or other support.
Then compare the load rating with the drawer’s expected use. A long, full-extension slide may improve access to items at the back, while a heavy drawer needs a rating suited to the box and its contents. The correct choice is the one that fits the existing setup, not simply the one with the most features.
Remove the Old Slides Without Damaging the Box
Clear the drawer, remove it from the cabinet, and place it on a stable surface. Keep any screws, clips, or brackets you may need to identify the old mounting arrangement. A fastener that spins or pulls out easily can indicate a damaged screw hole.
Remove the drawer-side hardware
Locate the screws or clips holding each slide member to the drawer. Release any locking mechanism before separating the pieces. Once the hardware is free, set the drawer aside and keep track of the left and right slide parts.
If the drawer is undermounted, look beneath the box for release clips or adjustment fittings. Don’t pry against the drawer bottom or force a clip that won’t release. The hardware’s shape and mounting points are useful clues when choosing a compatible replacement.
Remove the cabinet-side hardware
Unscrew the remaining slide members from the cabinet interior. Keep the cabinet surface intact, especially around the front and rear mounting points. If the old hardware used brackets or sockets, note where they sat and whether they were attached to a face frame or the cabinet side.
Clean the mounting area and inspect the old screw holes. Reusing sound holes can help maintain the drawer’s former position. However, a stripped hole may need a different secure mounting point so the new slide won’t loosen under load.
Install and Align the New Slides
Follow the replacement slide’s installation drawing for its mounting points and clearances. Even if the new hardware resembles the old set, its screw locations or adjustments may differ.
Attach the cabinet members first
Mark matching positions on both cabinet sides from a consistent reference point. Install the cabinet members at the same height, keeping them parallel and level. If one side sits higher or angles inward, the drawer can bind or sit unevenly.
Secure the slide members without fully tightening every screw at once. This leaves room for small adjustments after the drawer is in place. Blum and Salice slides include screws and templates, which can help with their specified installation patterns.
Attach the drawer members and refit the box
Position the drawer-side pieces according to the product instructions, then engage them with the cabinet-side members. If the slides use locking clips or adjustment screws, make sure each part seats correctly before loading the drawer.
Test the motion while the screws are still adjustable. The drawer should move without scraping and sit evenly in the opening. Once it glides properly, tighten the fasteners. For added context on installing and maintaining soft-close drawer slides, review the steps and care guidance for that hardware type.
Test Drawer Movement and Troubleshoot Problems
Open and close the drawer several times while it’s empty. Listen for scraping, clicking, or uneven movement. Check that the front stays level and that the box doesn’t drift open or stop short of closing.
If the drawer binds or rubs
First, check whether the cabinet-side members remain parallel and at the same height. Then look at the slide spacing, mounting position, and drawer depth. A slide that sits too far forward or too far back can affect how the drawer engages.
Loosen the mounting screws slightly and adjust the position in small increments. Don’t force a tight drawer through its full travel. Forcing it can bend the slide or damage the cabinet.
If the drawer sags or won’t close smoothly
Confirm that both sides engage fully and that the slides are firmly attached. Next, compare the drawer’s total load with the slide rating. A box that works when empty may sag or move poorly when filled with heavy cookware.
Soft-close mechanisms may also need correct engagement and alignment to operate as intended. If movement remains uneven after adjustment, recheck the replacement’s dimensions and mounting requirements. The original drawer can stay, but only if the hardware and box work together.
Frequently Asked Questions
Can I replace only one damaged slide?
Replacing both sides as a matching pair is generally the better approach. A new slide paired with an older, worn one may move differently and leave the drawer misaligned.
Can I switch from side-mount to undermount slides?
Sometimes, but it’s not a direct swap. Undermount systems often need specific drawer dimensions, bottom clearance, or fittings. If keeping the drawer box is the priority, replacing it with the same slide style is usually simpler.
How long does replacing drawer slides take?
Most slides bolt on in under an hour per drawer. The time depends on how easily the old hardware releases and whether the new slides fit the existing mounting points.
Keep the Drawer, Match the Hardware
Replacing slides can restore a drawer’s movement without replacing a sound box. The best results come from matching slide type, size, clearance, and load capacity before installation.
For a new kitchen or bathroom, plan the drawer box and hardware together as part of the cabinet design. When we help homeowners plan cabinetry, we consider how the storage will be used as well as how it should look.