 Skip to content
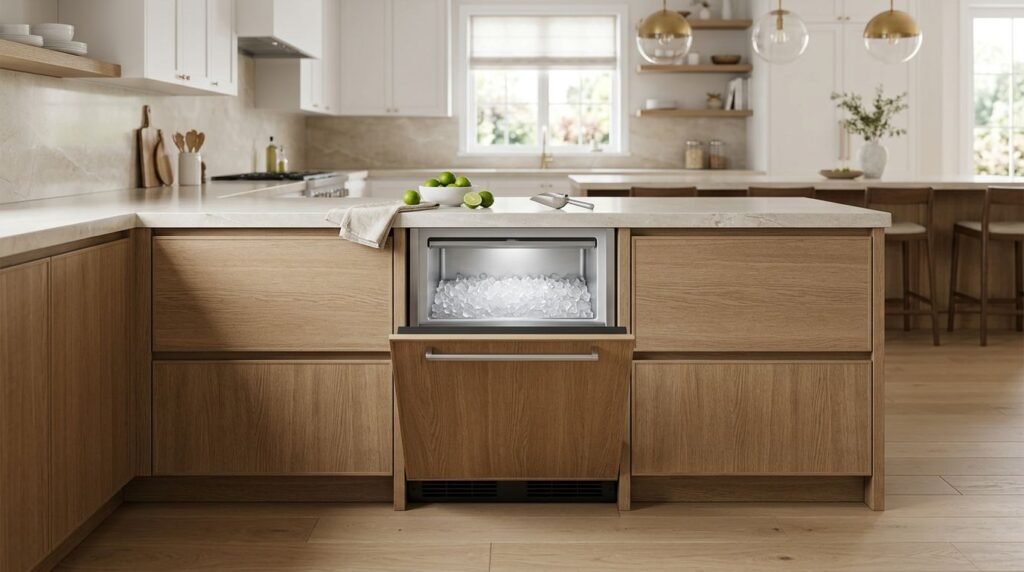
An undercounter ice maker can keep drinks cold and guests out of the main refrigerator. Yet a door that blocks a walkway or a hidden drain connection can turn a welcome upgrade into a daily annoyance.
A well-planned ice maker cabinet accounts for the appliance’s size, ventilation, plumbing, service access, and the way your household uses the kitchen. Choose the machine early, then let its installation requirements guide the surrounding cabinetry.
Ice Maker Cabinet Options That Fit Your Kitchen
Most built-in ice makers sit below the counter between base cabinets. The surrounding cabinetry frames the appliance, supports the countertop, and gives the unit a deliberate place in the room. An ice maker cabinet is not a standard base cabinet with an appliance forced inside. It is a planned opening that follows the selected model’s installation instructions.
Use an open undercounter appliance bay
An open appliance bay is the most flexible choice. Finished panels on both sides, a consistent toe kick, and a countertop above give the machine a built-in appearance while keeping its factory door visible.
This option works especially well with stainless-steel appliances. It also gives installers direct access to the front and makes it easier to follow the manufacturer’s ventilation requirements. The cabinetry should not pinch the unit or block a front grille.
Choose a panel-ready ice maker for a quieter look
A panel-ready model accepts a decorative front that matches nearby doors and drawer fronts. It suits a kitchen with a furniture-like feel, especially when the ice machine sits beside a panel-ready refrigerator or a dedicated beverage refrigerator.
However, the appliance manufacturer sets the allowed panel size, thickness, weight, and handle placement. Get those details before finalizing the cabinet order. A door panel cannot cover a vent or place too much weight on the appliance hinges.
A third option is a beverage station with the ice maker at one end and storage at the other. Drawers for glasses, napkins, and serving tools keep the station useful without sending people across the kitchen for every drink.
Choose a Location That Protects Kitchen Traffic
A convenient location matters as much as the appliance itself. Ice is usually needed when people gather, so the machine should be easy to reach without interrupting cooking, cleanup, or prep work.
Put ice near drinks, not beside the range
A beverage zone near the refrigerator, dining area, or patio door often works well. In Southwest Florida homes, a spot on the route to the lanai can keep wet hands and drink traffic out of the cooking zone.
An island end can also work when the aisle is wide enough for the door to open and the ice bin to slide out. Leave a nearby counter area for filling a glass or setting down a pitcher. Otherwise, users will claim the closest prep surface.
Keep the appliance out of busy work paths
Avoid placing an ice maker where its open door conflicts with the dishwasher, oven, pantry, or a main passage. Two people should be able to move through the kitchen while someone fills a glass.
The appliance also needs a practical relationship with water and drainage. A location near a sink wall can simplify those connections, although plumbing access should never override a comfortable layout.
Before choosing a cabinet run, review the whole room through kitchen cabinet layout planning. A beverage area works best when it supports the rest of the kitchen instead of competing with it.
Size the Opening Around the Appliance Specification
Cabinet dimensions should follow the appliance manual, not a guess based on a showroom display. Even machines that look similar can have different cutout widths, depths, height limits, and ventilation rules.
Start with the exact model number
Residential undercounter ice makers are commonly available in 15-inch, 18-inch, and 24-inch widths. Those labels describe the appliance category, not the finished cabinet opening you need.
Download the installation instructions for the exact model before cabinets are ordered. Record the required width, depth, height, front clearance, and any gap needed for airflow. Also check whether the door needs room to swing beyond the appliance sides.
A detailed kitchen cabinet measurements guide can help you document wall lengths, door swings, utilities, and appliance specifications before the design is finalized.
Measure finished conditions, not bare walls
The final opening changes once flooring, panels, countertops, and trim are in place. A machine can fit between unfinished studs yet become too tight after end panels and countertop overhangs are added.
Check the floor beneath the unit as well. It should be level, durable, and finished beneath the opening. If new flooring is planned, confirm the appliance can still slide out later for service.
The appliance manual is part of the cabinet plan. Treat its installation drawing with the same care as a countertop template.
Build the Cabinet Area for Water, Air, and Service
An ice maker produces moisture, which means the surrounding cabinetry needs practical protection. Attractive doors and panels matter, but the appliance also needs correct water, drainage, electrical access, and ventilation.
Plan water supply and drainage early
Plumbed-in ice makers need a water line, a shutoff valve, and a route for drainage. Some models use a gravity drain and need the drain connection at a suitable height. Others use or allow a drain pump, which changes placement options.
A nearby sink may help, but it does not automatically provide the required drain path. A plumber should review the model’s requirements and local code before cabinetry closes off access. If filtration is part of the plan, place it where filter changes remain easy.
Leave room for proper airflow and power
Many undercounter machines vent from the front, while others have different clearance rules. Follow the manual exactly, especially around the toe kick, sides, back, and top of the appliance.
The electrical receptacle should sit where it remains accessible and meets local requirements. Avoid placing it directly where the appliance body will press against the cord. A licensed electrician can confirm the correct outlet and circuit needs for the selected unit.
Design for routine service
A removable panel, accessible shutoff, or adjacent cabinet access can save trouble later. Do not bury a water valve behind fixed construction that requires cabinet removal.
A finished front only works when routine cleaning, filter changes, and appliance service do not require dismantling the surrounding cabinetry.
Bring the Beverage Zone Into Your Overall Cabinet Design
Good cabinet design makes an ice maker feel intentional rather than added as an afterthought. Door style, hardware, panel proportions, and nearby storage should all support the same visual rhythm.
Match the front treatment to nearby appliances
If the ice maker has a visible stainless front, repeat that finish with nearby appliances or hardware. A panel-ready model can disappear into a wall of cabinetry, though the appliance’s required gaps must remain visible in the final layout.
When a panel-ready refrigerator shares the same wall, carry its door style and proportions into the ice-maker panel. These refrigerator panel cabinets use the same integrated approach to reduce visual clutter around large appliances.
Frameless cabinets often pair well with flat, modern panels and consistent narrow reveals. Traditional framed cabinetry can use a matching raised or recessed panel, provided the appliance manual permits the panel dimensions.
Add storage that supports the ice station
A beverage area needs more than an ice machine. Nearby drawers give you a place for tumblers, cocktail napkins, straws, and serving pieces. Upper cabinets can hold less frequently used glassware if the station sits along a wall.
Consider what your household reaches for most often. Families may prefer durable everyday cups in a deep drawer. Frequent entertainers may want a pull-out for bar tools or a cabinet for serving trays. Keep fragile stemware away from a crowded traffic path.
A small counter section beside the appliance is useful for filling glasses and preparing drinks. Without it, the ice maker becomes a destination that still depends on the main prep area.
Set the Budget and Design Sequence Early
The cost of an ice maker cabinet depends on more than the appliance width. Finished end panels, custom door panels, specialty hardware, plumbing changes, electrical work, drainage, and nearby storage all affect the final investment.
Account for the parts people often overlook
A panel-ready machine may require a custom-sized decorative front and carefully matched hardware. An exposed machine may need finished side panels, filler pieces, and a modified toe kick to look complete.
Utility work can also vary widely. A straightforward location near existing water and drainage can require less construction than an island installation or a wall with no accessible plumbing. Get estimates after selecting the appliance, not before.
Make appliance decisions before cabinet orders
First, choose the ice maker model and collect its installation sheet. Next, mark its water, drain, power, and vent requirements on the kitchen plan. Then confirm the finished opening with the cabinet designer, contractor, and appliance installer.
Avoid ordering a standard base cabinet with the expectation that it can later become an appliance opening. Cabinet modifications made after delivery can affect finished panels, drawer placement, countertop support, and installation timing.
A clear plan also helps you decide whether the ice maker belongs in the main kitchen, a wet bar, or a separate entertaining area. The right location can reduce construction costs while improving everyday use.
A Kitchen Ice Station That Works Every Day
A built-in ice maker should make hosting and daily routines easier, not create another obstacle in the kitchen. The strongest plans start with the exact appliance and protect the space it needs for airflow, plumbing, service, and door clearance.
When cabinetry, utilities, and traffic flow work together, an ice maker cabinet becomes a polished part of the kitchen rather than a machine squeezed into an empty space.
