
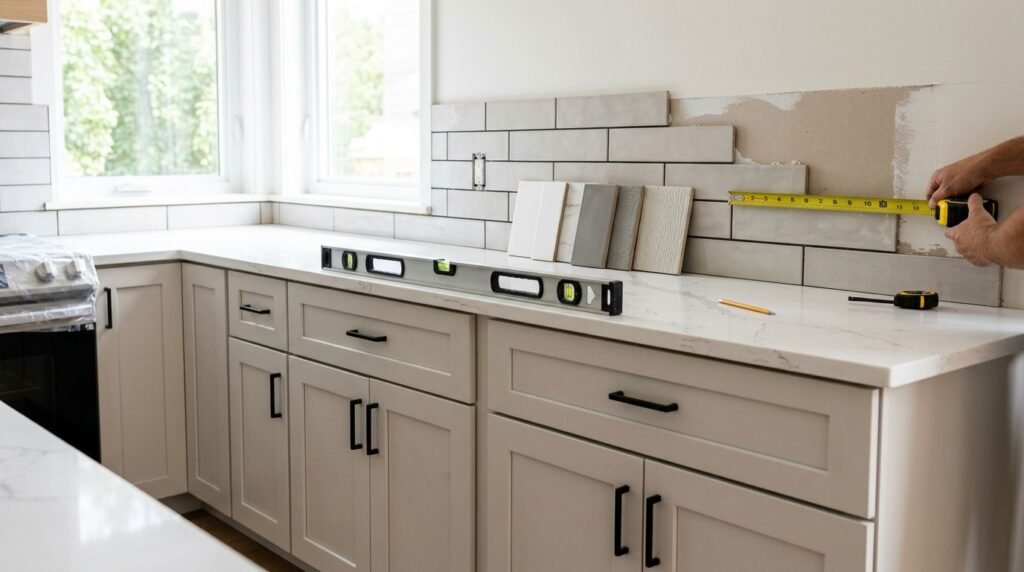
A beautiful backsplash can still create problems if it goes in at the wrong time. Knowing the right cabinet backsplash order helps protect new finishes, keep measurements accurate, and prevent gaps where the countertop meets the wall.
Most kitchen remodels follow a simple sequence: prepare the room, install and level the cabinets, template the countertop, install the countertop, then prepare and install the backsplash. A cabinet design consultation helps confirm measurements, appliance openings, wall conditions, and the finished layout before materials are ordered.
The cabinet backsplash order, step by step
The sequence matters because each stage depends on the one before it. Cabinets establish the countertop height and footprint. The countertop then establishes the bottom edge of the backsplash.
Plan the layout and order the cabinets
Before demolition begins, finalize the cabinet layout, finish, door style, hardware, fillers, panels, and specialty storage. Confirm the locations of appliances, sinks, windows, outlets, lighting, and plumbing.
Cabinets should be ordered before countertops because the countertop fabricator needs the installed cabinet footprint for an accurate template. A change to cabinet width, depth, or placement can affect the counter and backsplash dimensions.
Complete demolition and room preparation
Remove the old cabinets, countertop, backsplash, and any wall materials that won’t remain. Plumbing and electrical changes should happen before the new cabinets arrive.
Repair damaged drywall, check the wall for major uneven areas, and confirm that the floor can support the planned cabinet layout. Homeowners can use this kitchen cabinet installation prep guide to prepare the room for delivery and installation.
Install and level the cabinets
Cabinet installation comes before countertop templating. The installer secures the base, wall, and tall cabinets according to the approved plan. Base cabinets must sit level and align correctly because even a small shift can affect countertop seams, sink placement, and appliance clearances.
The crew may install wall cabinets before base cabinets, depending on the layout and working conditions. The order within the cabinet installation can vary, but the final boxes, fillers, panels, and supports must be in their finished positions before templating.
Why cabinets come before countertops and backsplashes
A countertop needs a stable, accurately positioned surface. The backsplash needs a finished countertop edge to establish its starting line.
Cabinets establish the countertop footprint
Countertops follow the cabinet run. Their depth, overhang, seams, sink opening, cooktop opening, and side returns all depend on the installed cabinets.
Cabinet walls can vary slightly because of construction tolerances. Installers level and secure the boxes, then add fillers or scribe pieces where needed. A fabricator measures after that work is complete, not from an early drawing alone.
This step prevents a common problem: ordering a countertop for the planned layout when the actual installed layout differs by a small but important amount.
The countertop creates the backsplash baseline
The backsplash typically meets the countertop at a visible joint. If tile or slab material goes in first, the countertop installer may damage it or leave an uneven connection.
Installing the countertop first gives the backsplash installer a clean, level reference. The tile can then meet the counter with a narrow flexible joint, which is usually finished with color-matched caulk rather than rigid grout.
The countertop is the handoff point between cabinet installation and backsplash installation. Until the counter is in its final position, the backsplash height and bottom edge can still change.
Countertop templating and installation are separate steps
Homeowners often treat the countertop as one appointment, but templating and installation happen at different stages.
Countertop templating happens after cabinet installation
Once the cabinets are installed, the fabricator visits the kitchen to take final measurements. Depending on the material and company, the crew may use a digital measuring system, a physical template, or both.
The team checks wall angles, cabinet depth, overhangs, seams, sink dimensions, cooktop openings, and finished end conditions. Have the sink, faucet, range, and other countertop-related products selected before this appointment. The fabricator may need exact specifications for each item.
Do not schedule templating while cabinets are still waiting for adjustments. A countertop template taken too early can produce incorrect cutouts or require expensive changes.
Countertop installation follows fabrication
After templating, the material is cut and finished at the fabricator’s facility. Installation then takes place after the cabinets have passed inspection and the countertop is ready.
The installers set the pieces, check the fit, join seams when required, and create openings for sinks or cooking equipment. They also secure the counter to the cabinets and finish the wall joint. The countertop must be stable before backsplash work begins.
Countertop installation may leave small areas that need attention, such as a wall void, an outlet location, or a section behind an appliance. Resolve those details before the tile installer starts.
Backsplash preparation comes before backsplash installation
Backsplash preparation is its own stage. It includes checking the wall, planning the layout, and preparing outlets and surfaces. Backsplash installation is the later stage when the tile, slab, or other finish is attached.
Prepare the wall after the countertop is set
Once the counter is installed, inspect the backsplash wall for loose material, dents, uneven patches, grease, or old adhesive. Clean the surface and complete any repairs required for the chosen material.
Tile may need a suitable drywall, cement board, or other approved substrate. The correct surface depends on the wall condition and product specifications. A smooth painted wall can work for some installations, while damaged or moisture-exposed areas may require additional preparation.
Check electrical boxes before setting tile. Outlet extenders or box adjustments may be necessary so receptacles sit correctly within the finished backsplash surface.
Plan the layout before applying tile
Measure the wall sections and decide where the pattern will begin. The installer should account for cabinet edges, windows, corners, outlets, hood areas, and exposed side returns.
A good layout places cuts where they are less visible and keeps grout lines consistent. It also confirms whether the backsplash will stop at the upper cabinets, wrap around a corner, or continue behind a range hood.
Only after the layout is approved should the installer apply adhesive or mortar. Tile installation includes setting the material, allowing the bond to cure, grouting where appropriate, and caulking changes of plane. The joint where backsplash meets countertop usually needs flexible caulk because those surfaces can move slightly.
When the usual cabinet backsplash order changes
The standard order fits most full kitchen remodels, but existing materials and product choices can change the schedule.
Full-height slab backsplashes may share the countertop template
A full-height stone, quartz, porcelain, or glass backsplash often requires detailed measurements. In some projects, the countertop and backsplash are templated during the same visit.
The countertop is still usually installed before the wall slab. However, the fabricator may install both pieces during one coordinated visit or return shortly afterward. Confirm whether the wall material needs extra support, special seams, or a finished edge before approving the order.
Reusing an existing countertop changes the sequence
If the existing countertop remains in place, the new backsplash may be installed after cabinet work without a new countertop template. This option only works when the cabinet footprint and countertop condition support it.
Changing cabinet sizes can create gaps along the counter or wall. The old countertop may also fail to fit new sink openings, cabinet depths, or appliance locations. In that case, keeping it can cost more time than replacing it.
Refacing projects may keep the backsplash
Refacing replaces visible doors and drawer fronts while keeping the cabinet boxes. If the layout and countertop stay unchanged, the backsplash may remain as well.
A cabinet refacing versus replacement comparison can help you decide whether the existing boxes suit your goals. If the project changes cabinet heights, adds storage, or moves appliances, expect countertop and backsplash work to enter the schedule.
A backsplash may need removal before new cabinets
An existing backsplash sometimes extends behind cabinets or blocks the new installation area. The crew may remove it during demolition so the cabinets can sit against the wall correctly.
That is different from installing the new backsplash. The old material can come out before cabinet installation, while the replacement material usually goes in after the new countertop.
Scheduling the trades without creating delays
Cabinets are the scheduling anchor for this part of the remodel. The countertop appointment depends on cabinet completion, and the backsplash appointment depends on countertop completion.
Order cabinets early enough to allow for manufacturing, delivery, inspection, and possible replacement of damaged parts. This kitchen cabinet ordering timeline can help you connect cabinet delivery with the rest of the project.
Keep the following dates coordinated:
- Cabinet delivery and inspection
- Cabinet installation and final adjustments
- Countertop templating
- Countertop fabrication
- Countertop installation
- Backsplash preparation and installation
- Plumbing, electrical, and appliance finish work
Leave room between appointments. A late cabinet delivery can move the template date, while a countertop fabrication delay can leave the backsplash installer waiting. Confirm the countertop material, sink, faucet, range, and backsplash product before booking the final trades.
For Southwest Florida remodels, delivery conditions, seasonal demand, and the availability of local installers can affect timing. Your cabinet company, countertop fabricator, and backsplash installer should agree on the sequence before demolition begins.
Homeowner checklist for the correct sequence
Use this order when reviewing your remodeling schedule:
- Approve the final cabinet design, measurements, appliance openings, and finish.
- Complete demolition, plumbing, electrical work, wall repairs, and floor preparation.
- Receive and inspect the cabinets before installation.
- Install, level, secure, and adjust the cabinet boxes and finished panels.
- Schedule countertop templating after the cabinets reach their final position.
- Approve countertop cutouts, seams, edges, and sink details.
- Install the countertop and check the wall joint and appliance clearances.
- Prepare the backsplash wall, outlets, corners, and layout.
- Install the backsplash, grout where required, and caulk the countertop joint.
- Complete plumbing, electrical connections, appliances, touch-ups, and final cleaning.
Conclusion: Plan the sequence before the demolition
The safest cabinet backsplash order is straightforward: cabinets first, countertop templating next, countertop installation after fabrication, then backsplash preparation and installation. Each step gives the next trade the fixed surfaces and measurements needed for accurate work.
When you approve the cabinet layout and coordinate delivery before booking the countertop or tile crew, the remodel has fewer avoidable interruptions. A well-planned sequence protects the finish of your new kitchen and gives the backsplash a clean, properly supported edge.