
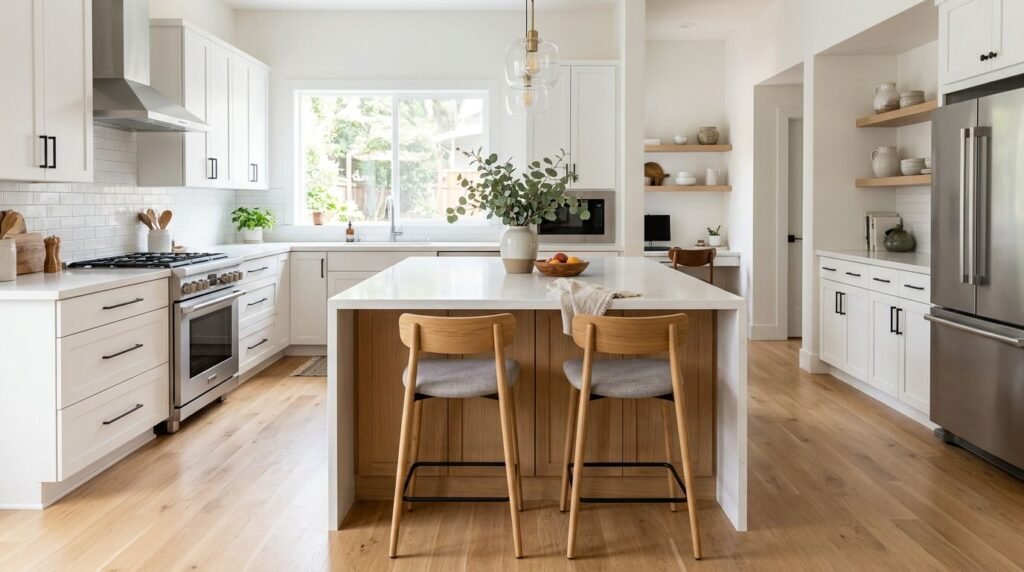
A kitchen island can look perfect on paper and still feel cramped once stools, people, and cabinet doors enter the room. Kitchen island seating clearances need attention before you choose cabinet sizes, countertop depth, or stool placement.
The main goal is simple: leave enough room for people to sit comfortably without blocking work areas, appliance doors, or the main path through the kitchen. A few measurements taken before ordering can prevent expensive cabinet changes later.
Key Takeaways
- Allow about 24 inches of island width for each seated person.
- Plan for at least 15 inches of knee space at a standard 36-inch counter.
- Keep 42 inches between the island and opposing cabinets for one-cook work areas.
- Allow 48 inches when two people need to work comfortably on opposite sides.
- Behind island seating, leave 32 inches without traffic, 36 inches for passage, or 44 inches where people regularly walk behind stools.
Start With the Island’s Main Job
Before measuring for stools, decide what the island needs to do. An island may provide seating, food preparation space, storage, a sink, a cooktop, or several of these functions. Each use affects the room around it.
A seating-only island usually needs less depth than an island with cabinets on both sides. A standard base cabinet is about 24 inches deep, though finished cabinet dimensions vary. Add the countertop overhang and the knee space, and the island can quickly become 40 inches deep or more.
For example, a 24-inch cabinet run with a 15-inch seating overhang creates an island that is roughly 39 to 40 inches deep before accounting for panels and countertop details. That depth may work well in a large kitchen, but it can crowd a narrow room.
An island with cabinets facing both directions needs more space. Two 24-inch cabinet runs create a 48-inch cabinet body before countertop overhangs. Add working aisles on both sides, and the room needs substantial width.
The island’s location matters as much as its dimensions. Keep the seating side away from refrigerator doors, dishwasher openings, and heavily used walkways whenever possible. A person pulling out a stool should not stand in the path of someone carrying a hot pan.
A comfortable island is sized around movement first, then storage and seating. Cabinet capacity cannot fix a blocked walkway.
Your overall cabinet design should account for the island, perimeter cabinets, appliances, windows, doors, and lighting at the same time. Ordering the island cabinets separately from the rest of the kitchen can create clearance problems that are hard to correct.
The Clearance Numbers That Matter
Several measurements guide a practical island layout. They apply to different situations, so don’t treat every number as the same type of clearance.
A walkway is the route people use to move through the kitchen. A work aisle is the space between an island and another work surface, such as a counter, range, or sink. Seating clearance measures the space needed for a person and stool.
| Planning area | Recommended clearance |
|---|---|
| General kitchen walkway | 36 inches |
| Work aisle for one cook | 42 inches |
| Work aisle for multiple cooks | 48 inches |
| Behind seated diner, no traffic | 32 inches |
| Behind stool with occasional passage | 36 inches |
| Behind stool where people walk regularly | 44 inches |
| Width per seated person | 24 inches |
| Knee space at a 36-inch counter | About 15 inches |
The 36-inch walkway guideline doesn’t automatically provide enough room behind island seating. A stool and seated person occupy more space than a clear path. If someone needs to walk behind a seated diner, measure from the island’s countertop edge to the wall, appliance, or other obstruction behind the stool.
A 32-inch gap can work when the area behind the stool has no traffic. It may feel tight if someone needs to pass. A 44-inch clearance is more comfortable for a regular route, especially when the kitchen connects to a dining room, patio door, or family room.
Work aisles need separate attention. If the island faces a range or sink, 42 inches gives one cook room to open drawers and turn without constant contact. If two people will work opposite each other, 48 inches is a better target.
Measure the narrowest point, not the widest section. A refrigerator handle, decorative post, thick countertop edge, or open oven door can reduce the usable clearance. The finished layout must work at its tightest point.
Size the Seating Area Around Real People
Island seating often fails because the counter is long enough for stools but not wide enough for comfortable use. Each diner needs about 24 inches of horizontal space. Two seats therefore need at least 48 inches of usable length.
That measurement describes the space between seating positions, not always the total cabinet width. End panels, legs, corbels, wine storage, and thick side panels can reduce the available room. If you want two stools, mark the actual sitting zones on the plan before ordering.
Stool type also affects comfort. Backless stools can slide beneath the counter and need less visual space, but they still require enough knee room. Stools with arms or tall backs need more room behind and beside each seat.
At a standard 36-inch counter, plan for about 15 inches of knee clearance below the countertop. The overhang must extend far enough to let a seated person’s knees move beyond the cabinet face. A shallow overhang may force people to sit sideways or lean forward.
Counter height should match the stool, the household, and the way you plan to use the island. A 36-inch counter uses counter-height stools. A 42-inch raised section needs bar-height stools and usually changes the sightlines across the kitchen. Mixing a raised bar with a lower work surface can also create a visual break and affect lighting placement.
A deeper overhang can improve comfort, but it needs proper support. Countertop manufacturers and cabinet installers may require brackets, posts, or other structural supports, depending on the material and overhang length. Don’t assume the cabinet boxes alone can carry a large seating ledge.
The seating side also needs room for knees when cabinet doors or drawers on the opposite side open. A drawer pulled out behind a seated person can create an awkward collision point. Check both sides of the island in the room’s busiest positions.
Map Doors, Appliances, and Traffic Before Ordering
A floor plan with cabinet dimensions is useful, but a full-size layout on the floor can reveal problems faster. Use painter’s tape to mark the proposed cabinet footprint, countertop edge, seating overhang, and nearby appliance openings.
Place actual stools or chairs inside the taped area. Then walk through the kitchen while someone sits at the island. Open the refrigerator, dishwasher, wall oven, and nearby drawers. This test shows whether a person can pass without turning sideways or bumping into an open door.
Pay close attention to the refrigerator. A French-door model may need less swing space than a single-door refrigerator, but the opened doors and pulled-out drawers still occupy the aisle. Dishwasher doors extend into the floor area, which can make a 36-inch gap feel unusable when the machine is open.
The main kitchen entry deserves the same review. If the island seating sits along the route between the kitchen and another room, stools may become permanent obstacles. A family may use the island for breakfast, homework, and conversation, so plan for occupied seats rather than empty ones.
Also check these items before final measurements:
- Door swings and trim
- Window casings and wall irregularities
- Heat-producing appliances
- HVAC vents and floor registers
- Pendant light locations
- Electrical outlets and appliance connections
- Clearance required by the countertop material
- Access for cabinet delivery and installation
Lighting deserves early planning because pendant fixtures often center over the island, not over the cabinet boxes. A large seating overhang may shift the useful centerline. Likewise, outlets and switches may need to move before cabinets arrive.
In older homes, walls and floors may not be perfectly square. A designer or installer can confirm field measurements, but the plan should still show every fixed obstruction. Cabinet dimensions based on a quick wall-to-wall measurement can leave an unexpected gap at one end.
Choose a Layout That Fits Your Kitchen
A long island with seating along one side works well when the room has enough length and the opposite work aisle remains open. It keeps guests away from the preparation surface while giving the cook a clear work zone.
End seating can solve a narrow layout problem. One or two stools may fit at the island’s short end without adding a full seating overhang along the entire side. However, end seating needs room beyond the island, and the cabinet end may require finished panels or special support.
A peninsula can provide seating without placing a cabinet block in the center of the room. It connects to a wall or cabinet run, so one side remains open. This option can work well in smaller kitchens, but the entrance and exit around the peninsula must stay clear.
Two-sided islands offer storage on one face and seating on the other. They can also include a sink or cooktop, but the increased depth demands careful aisle planning. If the kitchen cannot maintain proper work aisles on both sides, a slimmer island may function better.
Avoid placing seating directly beside a high-traffic appliance when another arrangement is possible. A stool next to the dishwasher may look efficient on the plan, yet daily loading and unloading can become frustrating. Similarly, seating beside a range can expose diners to heat and splatter.
Cabinet style affects the final dimensions too. Full-overlay doors, applied end panels, furniture feet, and decorative supports can change the usable cabinet face. Ask for dimensions that show the finished exterior, not only the cabinet box.
Before approving the layout, request a drawing that identifies cabinet widths, overhang depth, aisle measurements, appliance locations, and seating positions. This drawing gives you something concrete to review before the order becomes final.
A Practical Review Before You Approve Cabinets
Walk through the design in this order:
- Confirm the island’s finished length and depth, including panels and countertop overhang.
- Mark each seating position at 24 inches of width.
- Check knee clearance below the counter and confirm the stool height.
- Measure the work aisle to opposing cabinets, counters, and appliances.
- Measure behind the stools based on whether that area is quiet, occasionally used, or a regular walkway.
- Open every nearby appliance and cabinet door on the plan.
- Confirm support for the countertop overhang with the installer and fabricator.
- Review outlet, lighting, plumbing, and ventilation locations before cabinet production.
Local building requirements can affect electrical work, ventilation, plumbing, and accessible design. Cabinet clearances also vary with appliance models and manufacturer instructions. Use the planning numbers as a starting point, then confirm the final dimensions with your cabinet professional.
If the room feels tight during the taped-floor test, reduce the island size before reducing the aisles. A few inches of lost storage are easier to accept than a kitchen where people cannot pass comfortably.
Conclusion
The right island begins with clear space around it. Give each seat about 24 inches of width, provide enough knee room, and separate seating clearance from the work aisles and walkways.
Before ordering cabinets, test the layout with tape, stools, open appliance doors, and the traffic patterns your household uses every day. When the measurements work in real life, the finished island can support meals, preparation, and conversation without taking over the kitchen.