
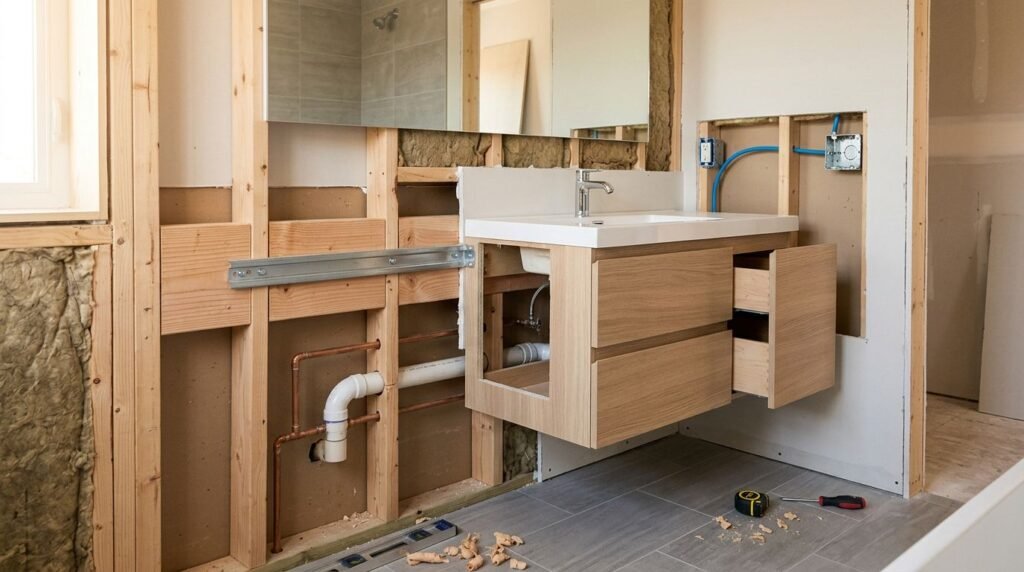
A floating vanity looks light, but wall blocking for a floating bathroom vanity must carry the cabinet, countertop, sink, and daily loads. Drywall anchors cannot provide that support, and a misplaced block can collide with a drain, water line, or electrical box.
Start with the vanity’s installation sheet and set measurements from the finished floor. A sound support plan connects the mounting rail to solid framing while leaving service routes clear. Before opening the wall, compare floating and furniture-style vanities so the width, storage, and installation needs are settled early.
Start With the Vanity Specifications
Floating vanities use different mounting rails, brackets, cabinet depths, and sink layouts. The manufacturer’s instructions control the fastener type, support locations, and required clearances. Treat the cabinet drawing as part of the framing plan, not as paperwork to review after the drywall goes up.
Measure the Cabinet and Finished Floor
Record the cabinet width, depth, and height. Then confirm the countertop thickness, sink style, backsplash, and the cabinet’s required distance above the floor. A vessel sink, for example, can change the finished countertop height even when the cabinet itself stays the same.
Use the finished floor as your reference, including tile or other flooring that hasn’t been installed yet. If the cabinet bottom will sit 10 inches above the finished floor and tile will add 3/8 inch above the subfloor, mark the cabinet bottom 10 3/8 inches above the subfloor.
Mark the cabinet bottom, top, and mounting rail separately. The rail’s fastener holes, not the cabinet’s outside edges, determine where the blocking must go.
Map Studs, Plumbing, and Electrical
Locate every wall stud and mark its centerline. A stud finder helps, but confirm locations with small exploratory holes before cutting a large opening. The mounting rail should fasten into studs or approved structural backing, never ordinary drywall anchors.
Mark the drain, supply valves, sink centerline, vanity light, and receptacle locations. Drawers may need clearance around the P-trap and shutoff valves. Good cabinet design accounts for these service areas before the cabinet is ordered, so storage remains usable after installation.
Bathroom receptacles generally require GFCI protection under local electrical codes. Keep electrical boxes accessible and make room for the electrician to install or service them without removing the vanity.
Plan Floating Vanity Wall Blocking During New Construction
New construction gives you the best access because you can install support before drywall, backer board, and tile cover the framing. The same pre-drywall window matters for upper cabinet blocking, where mounting rails need solid backing before the walls close. Confirm the rail elevation with the cabinet drawing before the plumber and electrician finish their rough-in work.
Install Solid Support at the Hardware Height
Many floating vanity installations use horizontal 2×6 or 2×8 blocks between studs. Others call for 3/4-inch structural plywood spanning several studs. Use the size and layout listed by the vanity manufacturer.
Position blocking where the rail or bracket fasteners will land. If the rail has several fastening zones, provide solid backing across those areas rather than placing one short block at the center. The support must sit flush with the bathroom-side face of the studs, so the drywall and finished wall remain flat.
Secure wood blocking to the studs with approved structural screws or framing nails. Drywall screws, finish nails, and construction adhesive aren’t substitutes for structural fasteners. Install the cabinet’s rail with the manufacturer’s specified screws after the finished wall is complete.
Account for Wall Thickness and Utilities
Standard 2×4 framing has a 3 1/2-inch depth, while 2×6 framing has a 5 1/2-inch depth. Use a blocking assembly that fits the wall cavity and keeps its bathroom-side face in the correct plane. Extra material can push the wall finish outward, while recessed support can leave the mounting rail unsupported.
Account for drywall or cement backer board, tile, and any waterproofing layer when selecting fastener length. Screws need adequate penetration into the blocking without extending farther into the wall than necessary. Place approved nail plates over nearby plumbing and electrical holes to protect them from future screws.
Don’t notch structural blocking around a pipe unless the framing plan or a qualified professional approves the change. Move the block above or below the utility path when possible.
Add Wall Blocking to an Existing Bathroom Wall
Remodeling an existing wall requires more investigation. Plumbing and wiring may run through the framing, and the wall may include tile, waterproofing, fireblocking, or structural sheathing.
Open the Wall Carefully and Secure the Blocks
Shut off water before working near supply lines. Turn off the relevant electrical circuit, then verify that wiring is de-energized with a suitable tester. Use stud locations and small inspection openings to identify pipes and cables before cutting between studs.
Remove a controlled section of drywall or backer board large enough to install the required blocking. Avoid cutting studs, pipes, cables, waterproofing outside the work area, or structural panels. If the wall is load-bearing, exterior, part of a shear system, or difficult to inspect, have a qualified contractor review it before you proceed.
Fit horizontal blocks tightly between the studs at the marked rail height. Fasten each end with approved structural screws or framing connectors designed for the connection. When the mounting rail spans multiple studs, a properly secured structural plywood backer can provide continuous fastening support if the vanity instructions allow it.
Patch the opening with wall material suited to the bathroom assembly. In a tiled shower-adjacent area, restore the approved backer and waterproofing system. Keep the blocking location, stud centers, and utility routes recorded before closing the wall.
Check the Support Before the Wall Is Closed
Hold the mounting rail at the planned elevation and check it with a level. Confirm that each required hole lands over a stud or solid blocking. If a hole misses support, move or add framing now. Don’t solve the problem later with a hollow-wall anchor.
Dry-fit the vanity location against the marked drain and supply lines. Check that drawers, the sink, and the countertop won’t interfere with valves, the P-trap, or an electrical box. Leave enough access for final plumbing connections and future service.
A vanity light box and receptacle must remain accessible and follow local electrical requirements. Never bury a junction box behind permanent cabinetry. If you find aluminum wiring, damaged cable, unknown plumbing, masonry, metal studs, or uncertain structural conditions, stop and bring in a qualified electrician, plumber, or contractor.
Conclusion
A floating bathroom vanity depends on accurate support, not the appearance of the finished wall. Use the cabinet’s mounting hardware to set blocking locations, measure from the finished floor, and keep plumbing and electrical paths clear.
New construction allows direct installation between open studs. Existing walls require careful inspection and controlled access. When the wall blocking, cabinet dimensions, and service connections align before closing the wall, the vanity can hang securely and function as intended.