
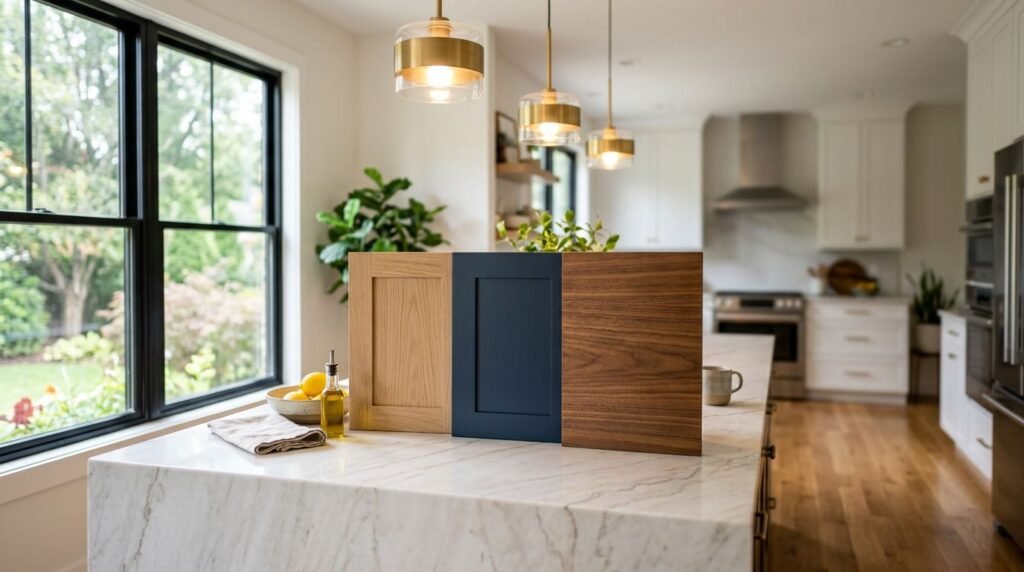
A cabinet color that looks perfect in a showroom can appear too gray, too yellow, or too dark in your kitchen. Cabinet door samples help you judge the finish in the room where you’ll live with it.
The best comparison happens in your own lighting, beside your flooring, countertops, appliances, and paint. Look at more than color, too. Door style, surface texture, construction, and daily maintenance all affect your final choice.
Start With the Room, Not the Sample
Before comparing cabinet doors, choose the exact spot where you’ll test them. Place each sample near the cabinets or wall it will relate to, rather than examining it on a dining table under one ceiling light.
Your kitchen or bathroom has several lighting conditions. Check the doors in the morning, afternoon, and evening. Natural light can change as the sun moves across the room, while warm bulbs may make white paint look creamier. Cool bulbs can make the same finish appear stark or slightly blue.
If your home receives strong Florida sunlight, look at the samples near windows and in shaded areas. A color that feels balanced in shade may look brighter in direct sun. Don’t judge a finish during a single five-minute visit.
Keep the surrounding materials in place during the test. Hold each sample beside the countertop, backsplash, flooring, wall paint, faucet, and appliance finish. A white cabinet can look warmer beside a cool gray countertop, while a wood tone may pull orange next to certain tile.
If the room is still under construction, collect physical swatches for the materials you’ve already selected. A phone photo or screen image can’t show the exact sheen, grain, or undertone. Even printed images can shift color depending on the paper and printer.
Set the samples at different angles, too. Cabinet doors reflect light across their face, edge, and center panel. A raised-panel door may create more shadow than a flat slab door, even when both use the same paint color.
Keep the room’s permanent materials nearby. A cabinet finish should work with the complete space, not look attractive by itself.
Compare Door Style and Construction
Color gets attention first, but the door profile often has a larger effect on the room’s character. Compare the shape of the center panel, the width of the rails and stiles, and the amount of detail around the edges.
Flat-panel doors have clean faces and work well in modern, transitional, and smaller spaces. Shaker doors add a framed look without heavy ornament. Raised-panel doors bring more traditional detail and may cast stronger shadows under overhead lighting. Slab doors have no frame or center panel, so the finish becomes the main visual feature.
Place samples side by side at the same height. Look at the proportions rather than focusing only on the finish. A narrow rail can make a door feel lighter, while a wider frame may create a more substantial appearance.
Ask how each sample is made. A door may use solid wood, a wood veneer, medium-density fiberboard (MDF), laminate, thermofoil, or another material. Each option has different characteristics. Wood can show natural grain and variation. MDF often provides a smooth painted surface. Laminate and thermofoil can offer consistent color and easy cleaning, although care instructions vary by product.
Inspect the sample’s edges and back. Check whether the finish wraps around the edges and whether the back has a matching color or a different surface. Open and close the sample if it includes hinges or hardware. Pay attention to how the door feels in your hand. A sample shouldn’t be judged like a flat paint chip because cabinet doors have weight, thickness, and moving parts.
Construction details also matter in bathroom cabinetry. Vanity doors face humidity, water splashes, and frequent cleaning. The sample won’t predict every part of the cabinet box, but it gives you a chance to ask about materials, finish care, and warranty terms before ordering.
For a broader cabinet design consultation, bring your samples and room measurements together. A designer can help compare door profiles while considering storage, clearances, and the cabinet layout.
Test Color, Sheen, and Texture in Real Light
Once you’ve narrowed the door style, compare the finish itself. Start with undertones. White may lean warm, cool, gray, or beige. Green, blue, and gray finishes can also shift depending on nearby colors and the type of light in the room.
Hold each cabinet door sample against the wall paint and countertop. Step back several feet, then view it close up. At a distance, the overall color and door pattern dominate. Up close, you’ll notice brush texture, wood grain, tiny flecks, and the way light moves across the finish.
Sheen changes the appearance and cleaning experience. A higher sheen reflects more light and can make a small room feel brighter. However, it may reveal fingerprints, uneven surfaces, or small marks more readily. A lower-sheen finish tends to look softer and may disguise minor surface variation, but it can still show grease if the area receives heavy use.
Run a clean, dry hand across the sample. A textured wood grain feels different from a smooth painted door, and that difference affects everyday cleaning. Don’t scrub the sample unless the supplier gives you permission and specific care instructions. Finishes can respond differently to water, soap, and household cleaners.
For painted doors, inspect corners, inside edges, and the center panel. Look for consistent coverage and a finish that matches across the sample. With stained wood, examine the grain direction and color variation. Natural wood won’t look identical on every door, so ask how much variation to expect.
Place the sample near your countertop overhang, backsplash, or flooring transition. These close combinations often reveal issues that aren’t visible when materials are separated. A sample may look neutral alone but appear pink, green, or yellow beside another surface.
Take a quick photo for your own reference, but use your eyes as the final judge. Camera exposure and automatic color correction can change the finish. Physical samples under your home’s lighting provide better evidence.
Use a Simple Comparison Process
Several samples can become confusing after a few days. Give each option a clear name, then record what you notice in the same order. A small notebook or phone note can help you compare observations without relying on memory.
Use this process for each sample:
- Place the door in the same location and photograph it only as a reference.
- Check the finish in daylight, shade, and evening light.
- Compare it with the countertop, flooring, backsplash, and wall color.
- Inspect the face, edge, back, center panel, and grain or texture.
- Wipe the sample with a clean, damp cloth if the manufacturer’s care directions allow it.
- Record what you like, what concerns you, and which nearby materials affect your opinion.
- Leave the sample in the room for at least one full day before ranking it.
Use a rating system that matches your priorities. You might score color compatibility, door style, cleaning needs, texture, and expected durability on a scale of one to five. The numbers won’t make the decision for you, but they can expose a sample that looks attractive while creating practical concerns.
Ask other household members to review the samples separately. Their first impressions can reveal differences you’ve stopped noticing. Keep the discussion tied to the room and the intended use, rather than choosing a finish because it looks good in a standalone photo.
If two options remain close, remove the weaker one for a day. Then bring it back beside the leading choice. The difference often becomes easier to see after your eyes adjust to one finish.
Avoid comparing more than four or five samples at once. Too many similar whites or wood tones can blur together. Start with broad categories, such as painted, stained, textured, or smooth, then narrow the field.
Check Function, Maintenance, and Total Cost
A cabinet door has to suit the way you use the room. Kitchens with active cooking areas may need finishes that tolerate regular wiping. Bathroom vanities may need careful attention around sinks and wet towels. Homes with children, pets, or frequent guests may benefit from a finish that doesn’t make every fingerprint obvious.
Ask for written care instructions before you approve the order. Find out which cleaners are allowed, whether the finish needs immediate drying, and how the supplier handles touch-ups. Avoid assuming that two doors with similar colors have the same maintenance requirements.
Hardware can change your evaluation, so test the sample with the pulls or knobs you’re considering. Hold a finish sample beside brushed nickel, matte black, brass, or bronze hardware. The combination may shift the room’s appearance more than expected.
Also compare the full project cost, not only the price of the door. A cabinet door may require different hinges, matching end panels, finished sides, decorative panels, or trim. If you’re replacing doors on existing boxes, confirm the measurements and hinge locations before selecting a style.
Ask these questions before placing an order:
- Is the sample an exact production finish or a color approximation?
- Will painted or stained doors show natural variation?
- Are matching panels and trim available?
- Which cleaning products can damage the finish?
- What happens if the final doors differ from the approved sample?
- Does the quoted price include hardware, delivery, installation, and adjustments?
A sample can help you select a finish, but it can’t confirm whether the planned layout has enough drawer space or comfortable door clearance. Review the complete cabinet design before making a final commitment.
If you’re updating several rooms, compare finishes under the same conditions. A kitchen and bathroom can use different door styles, but repeated colors or hardware finishes may help the home feel connected. The right choice depends on the rooms, not on a rule that every cabinet must match.
Make the Final Choice With Confidence
After testing the samples, choose the finish that remains comfortable in real conditions. A color that looks appealing only under evening bulbs may disappoint you every morning. Likewise, a door style that photographs well may feel too detailed beside your existing flooring or appliances.
Keep the approved sample with your project documents. Write down the manufacturer, finish name, door style, sheen, and any care instructions. If several people are involved in the renovation, everyone should refer to the same approved sample.
Before ordering, confirm the final selections in writing. Check door style, color, material, edge treatment, hardware, panels, and installation details. Small differences can affect the finished room, especially when cabinets cover a large wall.
The strongest comparison focuses on how the door works with the space. Color matters, but so do changing light, surface texture, cleaning habits, hardware, and the surrounding materials. Those details turn a cabinet sample into a reliable decision tool.
Conclusion
Cabinet door samples are most useful when you test them at home, beside the materials and lighting they’ll meet every day. Compare the door profile, surface, sheen, construction, maintenance needs, and complete project cost before you choose.
A showroom can introduce your options, but your kitchen or bathroom provides the final test. Give the samples time, view them throughout the day, and keep the approved choice with your renovation records. The best cabinet door is the one that still looks right after the room’s lights change and daily life begins.